Knowing when staff is available to work and when they need time off is important for scheduling classes and finding substitutes. By tracking Staff Availability in Jackrabbit, you can see at a glance who is available and who isn't on the Daily Calendar, simplifying your planning.
Increase efficiency by allowing staff to communicate their availability to office administrators through their Staff Portal. Entering their own hours of availability and time off in the Staff Portal ensures there are fewer errors and more timely updates.
Settings for Staff Availability in the Staff Portal
Once you have customized your general Staff Availability settings (Gear icon > Settings > General > Organization Defaults), you will need to give your staff access to their availability in the Staff Portal.
The options are:
Allow staff person to view availability | Set this to Yes to allow them to view their available time and time off. |
Allow staff person to manage availability | In order for this to be set to Yes, the staff member must already have the ability to view their availability (above). This setting allows them to add, edit, and delete their availability and time off (i.e., manage availability). |
Manage Settings for Individual Staff
The Staff Availability settings for the Staff Portal can be managed at the individual staff level from the Staff record > Portal Settings tab > My Schedule Tab section.

Note: If a staff member is set to only be able to view their availability but not manage it, they will not see the manage options above their schedule cards (availability and time off).
Manage Settings for Multiple Staff at Once
To work with the Staff Availability Staff Portal settings for multiple staff at once:
- Go to the Staff menu > Staff Portal > Edit All Staff Settings.
- Check the boxes next to the names of the staff whose Staff Portal Settings you want to set up or edit. Click the Check All button if the changes will apply to all staff listed. Use the Uncheck All button to reset.
- In the My Schedule Tab section, define whether the selected staff will be able to view and manage their availability in the Staff Portal, or if they should only be able to view it. Save your changes.

View and Manage Availability in the Staff Portal
Availability is managed from the My Schedule page of the Staff Portal.
- Log in to the Staff Portal and open the menu (if you are working on a larger screen, go to the My Schedule tab).
- Select My Schedule.
- Click the View Availability button.
On the My Schedule > Manage Availability page you will see schedule cards displaying scheduled availability and time off.

When you have access to manage availability, you will also see:
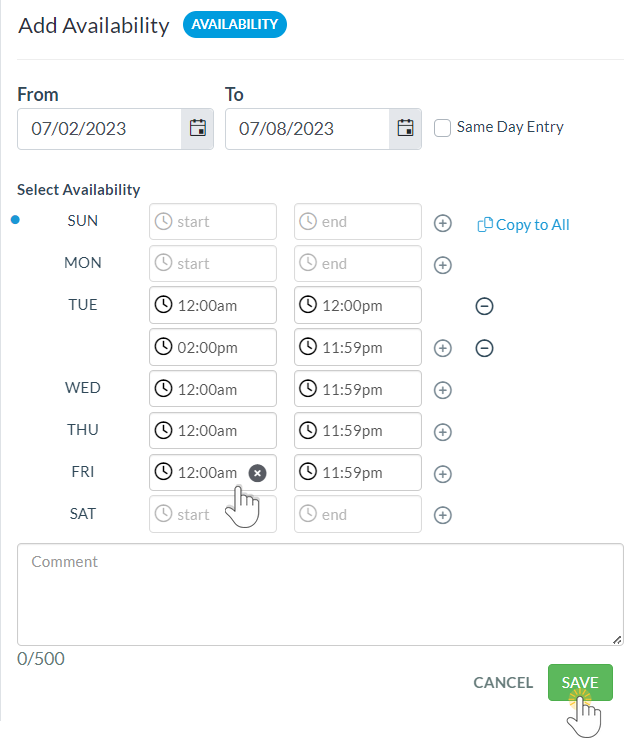
| Add Availability (button) | Use the Add Availability button to open the Add Availability window.
|
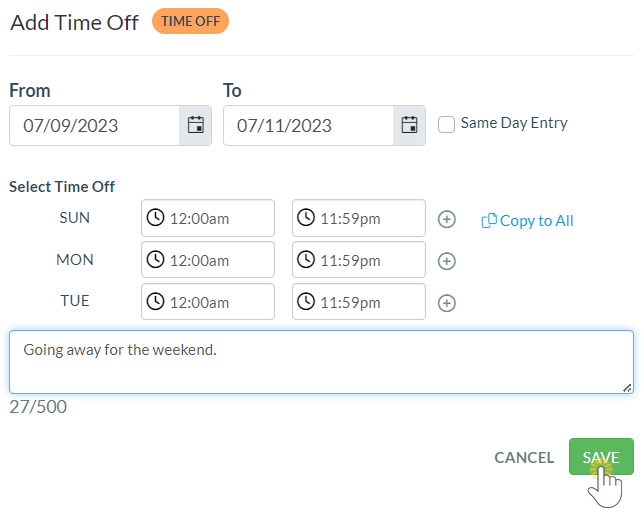
| Add Time Off (button) | Use the Add Time Off button to open the Add Time Off window.
|
| Edit (link in schedule card) | Opens the availability or time off modal where you can edit the individual time blocks in the schedule card or delete all of them. |
| View Comment (link in schedule card) | Allows you to see any comments that were added when the availability or time off was scheduled. |
| Delete (link in the schedule card) | Deletes all of the time entries in the schedule card. |
Export/Print | Use the Export/Print icon |
 When a Time Off entry is created, edited, or deleted, a corresponding Substitute record is created, edited, or deleted. Learn more about the
 Keep Track of Availability Changes Made in the Staff Portal
It's important to know when staff have made changes to their availability through their Staff Portals. There are a couple of ways to monitor this activity.
Staff Availability Notifications
Whenever a staff member makes changes to their Availability or Time Off through their Staff Portal, you can opt to have a notification email sent to a specific email address with the details of any changes made.
Go to the Gear icon > Settings > General and scroll down to the Staff Availability Settings section. Select the Yes radio button to turn on the notification emails. The email address defaults to your organization's email address (Gear icon > Account > My Account > Organizational Defaults) but can be changed if needed.

User Activity
All activity in the Staff Portal is captured in User activity and you can run a report on that activity to see what changes were made to your staff's availability.
Use Search User Activity to generate the report:
- Go to Reports (menu) > Find Reports.
- Enter User Activity in the Keyword Search and click the magnifying glass to search.
- Search User Activity will display with a link to take you there.
All User activity is logged and can be searched, the trick is in knowing how to sift through it all!
Each action a User takes creates an Event in the log. Each time that action is in the Staff Portal, the Event will include the term Staff Portal in the Event description.
To narrow the report to only activity in the Staff Portal, enter that term in the Event criteria field. The report that is generated gives a detailed description of the changes made.
