The first step in creating an event is to create the Event Type.
Think of the Event Type as the umbrella ☂️. All the specific dates and times for that event fit under it, and you'll add those details in the second step of creating your event.
The Event Type customizes the registration form used for all occurrences of this type of event and defines things like payment policies and legal policies (agreements). These settings will be the defaults; however, they can be overridden for individual Event Dates/Times as needed.
To create an Event Type:
Go to the Activities (menu) > Events > Add Event Type.
Add an Event Type Name, Location, and Category 1.
Save your changes. The Event Type is created and opens to the Summary tab.
Enter specifics about the event on the Summarytab of the Event Type record. While the fields are optional, we recommend you complete as many as possible. Save Changes.
Event Type Summary Tab - Fields Explained
Fee
Enter the cost of the event per registrant as the Event Fee.
Allow Enrollment For
Select Family if you prefer to allow customers to enroll their Family and fill 1 event opening. Select Student to allow the customer to enroll up to 5 students and fill 1 event opening per student. Note: What you enter here will be the default for all Event Dates/Times, but it can be changed for any of the event dates individually.
Min Age/Max Age
Enter a Minimum Age and Maximum Age for the event, including years and months. The min/max age can be used to set age restrictions for event registrations.
Note:Minimum Age and Maximum Age are only factored in if Allow Enrollment For is set to Student.
Cut Off Date
Optionally, enter a Cut Off Date. If a cut-off date is entered, the student's age on the cut-off date is used to determine if the student meets the event's age requirements.
Note: Cut Off Date is only factored in if Allow Enrollment For is set toStudent.
Category 1
Select a Category 1 to have assigned to all of the event fees.
Cat 2/Cat 3
Add a Category 2/Category 3 if applicable. These fields will further classify the event fees.
Maximum Size
Enter a Maximum Size for the event. Note: For a Birthday Party or Private Event, enter the Maximum Size as 1. This ensures that only one customer books the event.
Payment Method Information
Do you require parents to save a payment method before enrolling in this Event Type?
If ePayments is not set up, this section is not visible.
If ePayments is set up, you will see a Payment Method Information section with a Credit/Debit Card Information field and a Bank Account Information field (Yes/No/Optional). If payment in the Parent Portal is required, they will also see a checkbox for Omit this Event Type from requiring payment during Parent Portal enrollment.
Select Yes to require that the credit card fields be completed. Select No to hide the credit card fields. Select Optional to display the fields but allow the registrant to choose whether or not to add credit card details.
Note: The option to pay via bank account is unavailable when registering for an event. This field would only be capturing that information to secure the booking.
Post Event Fee Per
Select Family to auto-post the fee once per family. Select Student to auto-post the fee once per student. Select Do Not Post Fee if you do not want the event fee to automatically post when a customer registers.
Session
Add a Session from the Session drop-down choices.
Transaction Type / Sub-Type / Note
If Post Event Fee Per is either Family or Student, include a Transaction Type. Optionally, include a Sub-Type and Note.
Display on Internal Calendar
Select Yes/No depending on whether this event should be displayed on the internal Event Calendar. This calendar can only be seen by a User logged into Jackrabbit.
Calendar Label
Whatever you type here will display as the Event Name on the Event Calendar.
Background Color
Click the crayon icon to choose a color. This color will be a background for the Calendar Label on your internal Event Calendar. We recommend using lighter colors as they make the calendar easier to read.
Display to Customers
Select which event dates to display on your external Event Calendar and in the Parent Portal :
Select No if you do not want any dates to display.
Select Open Dates Only to display only those events with an open status.
Select Open & Booked Dates to display event dates with an open status and allow enrollment. Booked and unavailable event dates will also be displayed but will not allow enrollment.
Note: Regardless of this setting, an Invitation-Only Event will not display on your external Event Calendar or in the Parent Portal.
Calendar Header
Create a header for your Event Calendar that displays when it has been filtered for a specific Event Type. The Event Calendar below is filtered for the Event Type Circus Birthday Party. It has a Calendar Header assigned, Birthday Parties.
Online Reg Form Graphic URL
Customize your event registration form with special images or graphics for specific events. The image must reside somewhere on the Internet and have a URL (a web address that usually starts with https:// or http://) to be displayed on your registration form. Enter that URL here.
Notification Email(s)
Whenever a customer registers for an event, an email notification will be sent to the email address(es) entered here. Separate multiple email addresses with a comma.
On the Description tab, add the Internal Description (Users within Jackrabbit see this description) and the Registration Form Description (customers will see this description). Save Changes.
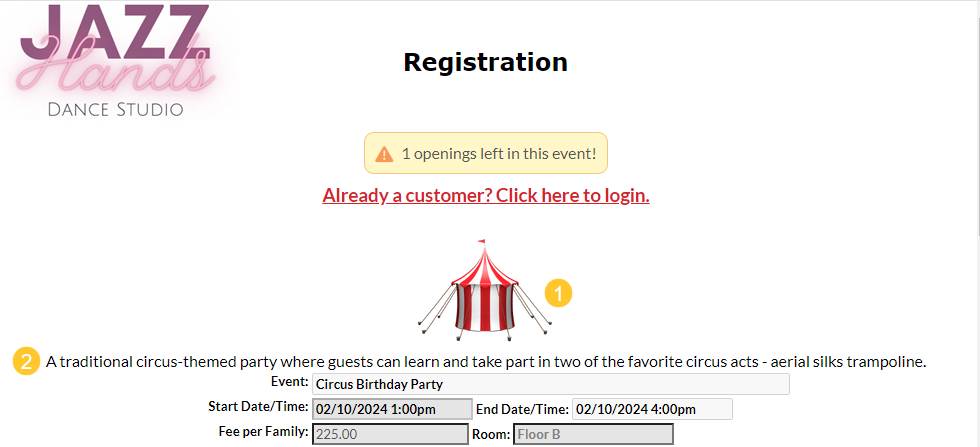
Sample Event Registration Form
1 - Customize your registration form with a graphic of your choice. It must be 'live' online and have a URL, which is added to the Event Type > Summary tab in the Online Reg Form Graphic URL field.
2 - Add a description of the event to your registration form.
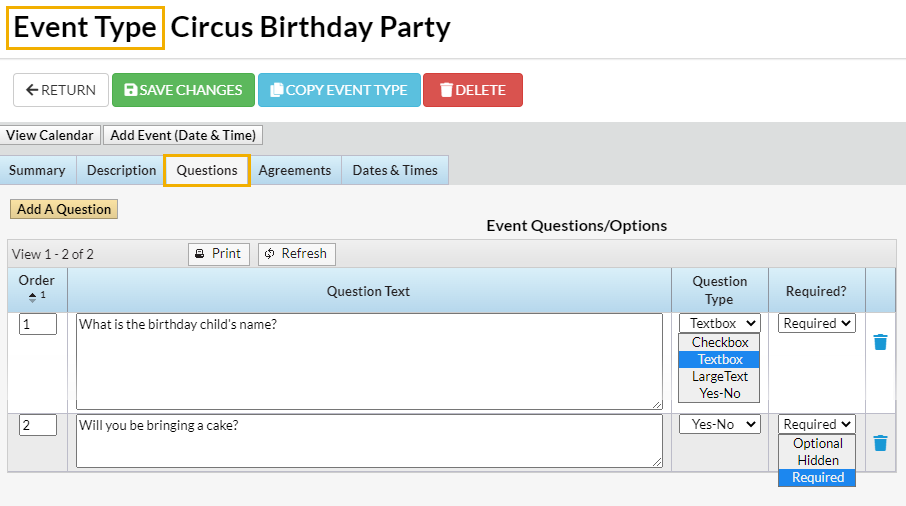
On the Questions tab, add questions that you would like event registrants to answer, such as "Will you be bringing cake?" Questions can be formatted as checkboxes, text boxes, large text boxes, and yes-no questions. They can also be set to optional, hidden, or required, with the exception of checkbox questions that can't be made required.
Answers are stored in the Event Date/Time record on the Questions/Options tab. From there, you can print the answers for that event date or export them (Excel, .CSV, or PDF).
Sample Event Type Questions tab
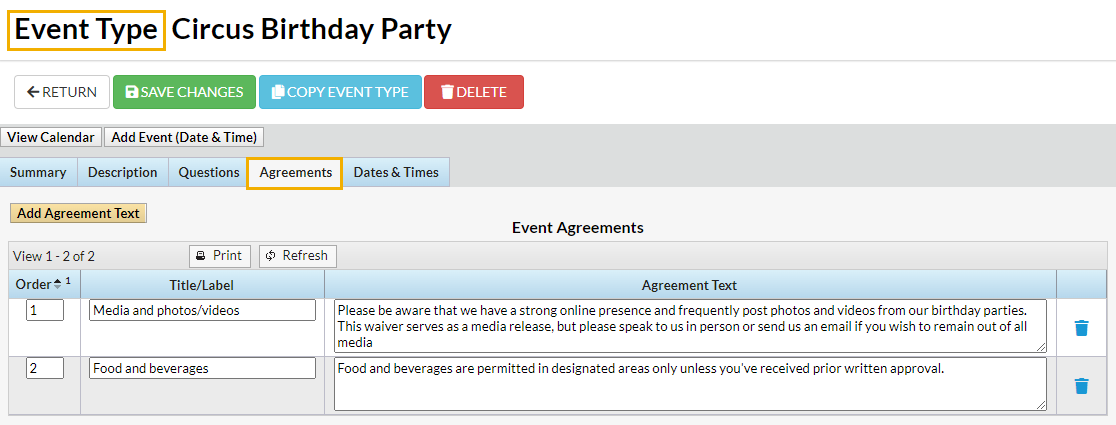
Select the Agreements tab. Enter any legal policy or verbiage you'd like the customer to agree to prior to registering for an event. Each agreement text record will be followed by its own I Have Read and Agree checkbox on the Event Registration Form. The customer must check these boxes and enter their e-signature in order to submit the registration form.
Sample Event Type Agreements tab
Click Copy Event Type to quickly create another similar Event Type. This will copy all information on the Event Type Summary tab to the new Event Type with the option to copy questions and agreements.
Q. I don't understand what an Online Reg Form Graphic URL is or how to add it?
A. Each Event Type allows you to add a graphic or image to the registration form associated with it. You can create and use special images and graphics for specific events. For example, you may have a special image that you use for birthday parties and a different image that you use for open houses.
In order for the image to be displayed on your event registration form, it needs to reside somewhere on the internet and have a URL (a web address that usually starts with https:// or http://). In many cases, you may already have the image somewhere on your website. If not, there are many cloud-based services that provide an instant URL when you upload the image to the service.
Q.Can you explain why some of my Events have a background color of light yellow? I didn't select that color.
A. When an Event has reached the maximum enrollment, it will display on the events calendar in a light yellow color. This means the Event status has changed to booked.
Q.Can I automatically add the tax to Event Fees?
A. Yes, go to the Gear icon > Settings > General > Organization Defaults (left menu) > Tax Settings (section) and set Tax Tuition Fees to Yes. (Note: this will also apply tax to Class tuition)
Q. Why can't I make the checkbox event questions required?
A. As a question, a checkbox type has 2 possible answers; unchecked (clear) says one thing, and checked (selected) says the opposite. You can't require registrants to select the checkbox because leaving it blank is actually one of the possible answers.
If you want to make questions required, it's best to ask yes/no questions.