Jackrabbit can automatically assign a size to students in a class based on their girth measurement and the size chart associated with the costume that has been added to the class.
To use the auto-size feature you must first:
- Confirm the Hide Auto-Size is set to NO (Gear icon > Settings > General > Costume/Apparel Module Settings).
- Assign students a girth measurement (see Assign Sizes to Students)
- Create a vendor and vendor size chart (see Create Costume (Apparel) Vendors and Vendor Size Charts)
- Create a costume with an assigned vendor size chart and add it to the class (see Add Costumes (Apparel) to Classes and Students)
Auto-Size Costume(s) for an Individual Class
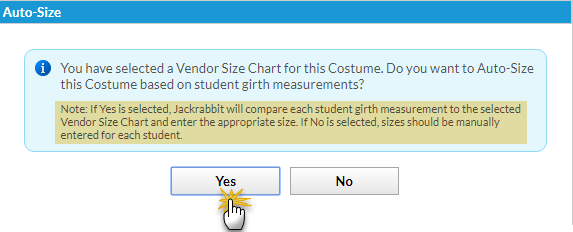
When you add a new costume that has a selected vendor size chart to a class you are given the option to auto-size the costume for the students currently enrolled in the class.

When adding an existing costume to a class you are also given the option of auto-sizing the costume for the students in the class.

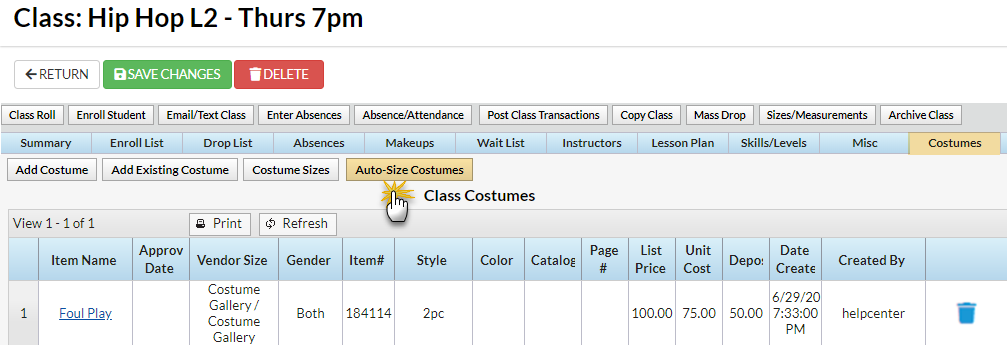
Additionally, you can auto-size a costume that has already been added to the class using the Auto-Size Costumes button on the Costumes tab of the Class record.

If you have already manually added costume sizes to the students in the class you can select whether or not you want to override those measurements and replace them with the automatically generated sizes.

Auto-Size Costume(s) for Multiple Classes
You can auto-size costumes in multiple classes at once from the Classes (menu) > Costume Management with the Auto-Size Costumes (left menu) option. Use the criteria to select the classes that you are looking to automatically size costumes for by filtering by session, classes, instructor(s), or vendor(s).
You are given the option of overriding all existing costume sizes and updating them with the new auto-size information.

Learn How to Avoid Auto-Sizing Overlap
Girth sizes CAN overlap in a size chart. If girth sizes overlap, Jackrabbit's auto-size feature selects the first size that matches.
Many costume companies overlap girth sizes. When the auto-size feature in Jackrabbit is used and a student's girth falls into two size ranges, Jackrabbit will select the first size it detects. One way to avoid this is to adjust girth ranges based on your organization's knowledge of specific costume companies. Rather than create size charts for the vendor in Jackrabbit that overlap, an organization may adjust the girth ranges based on their knowledge of the way the costume company sizes.
In this example of a major costume company child and adult size charts, girth ranges overlap both from one size to the next size up and also from Child Large through Adult Petite. The organization has chosen to adjust the girth 'from' size so that they do not overlap. They will also change the max girth on the Child Large to 53.5 and omit the Child X-Large and Child XX-Large.
Major Costume Company Size Chart Example:


Same Size Chart Created in Jackrabbit:

Frequently Asked Questions
Q. How can I make sure I don't order costumes for students who dropped out of class after they were auto-sized?
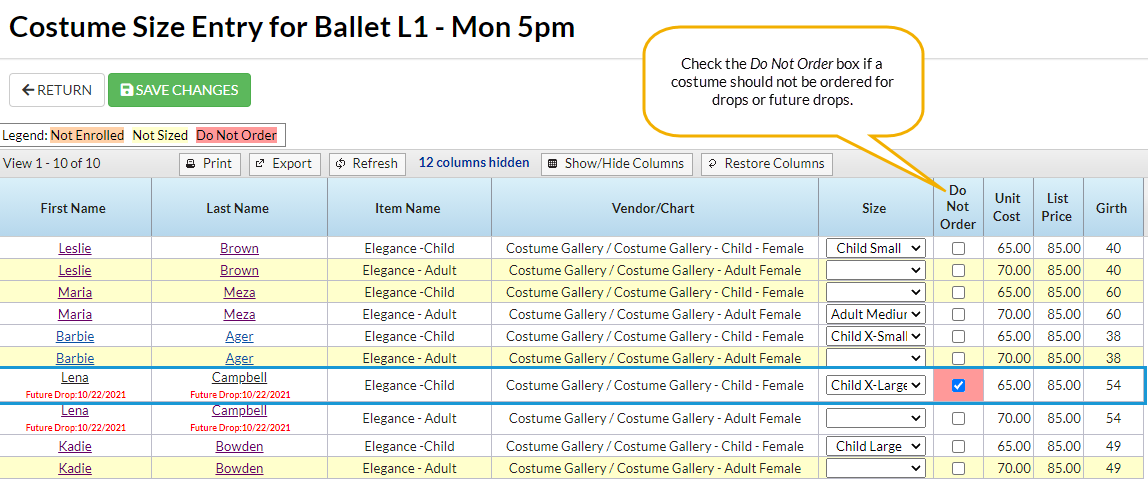
A. When a student drops after costumes have been assigned to classes and sized, Jackrabbit does not change their costume status to Do Not Order. A Jackrabbit User should go to the Class page > Costumes tab > Costume Sizes button to check the Do Not Order checkbox.
Prior to creating orders, we recommend you run a Drop History report to find dropped students to mark as Do Not Order when needed. The report can be found under the Students (menu) > Student Reports > Drop History. Jackrabbit color codes the Class Costume Size Entry page for visual assistance.
Q. How can I be sure I haven't missed SIZING any newly enrolled students?
A. Before creating orders, it's a good practice to run an Enrollment Detail report to locate any students who enrolled after you created and auto-sized costumes.
