Use Jackrabbit’s Add Class drawer to quickly create a new class from the Activity Calendar, Classes > Add Class, or the All Classes page. Enter key details, customize fields to your preferences, assign or add instructors, and avoid scheduling issues with built-in conflict detection for instructors and rooms.
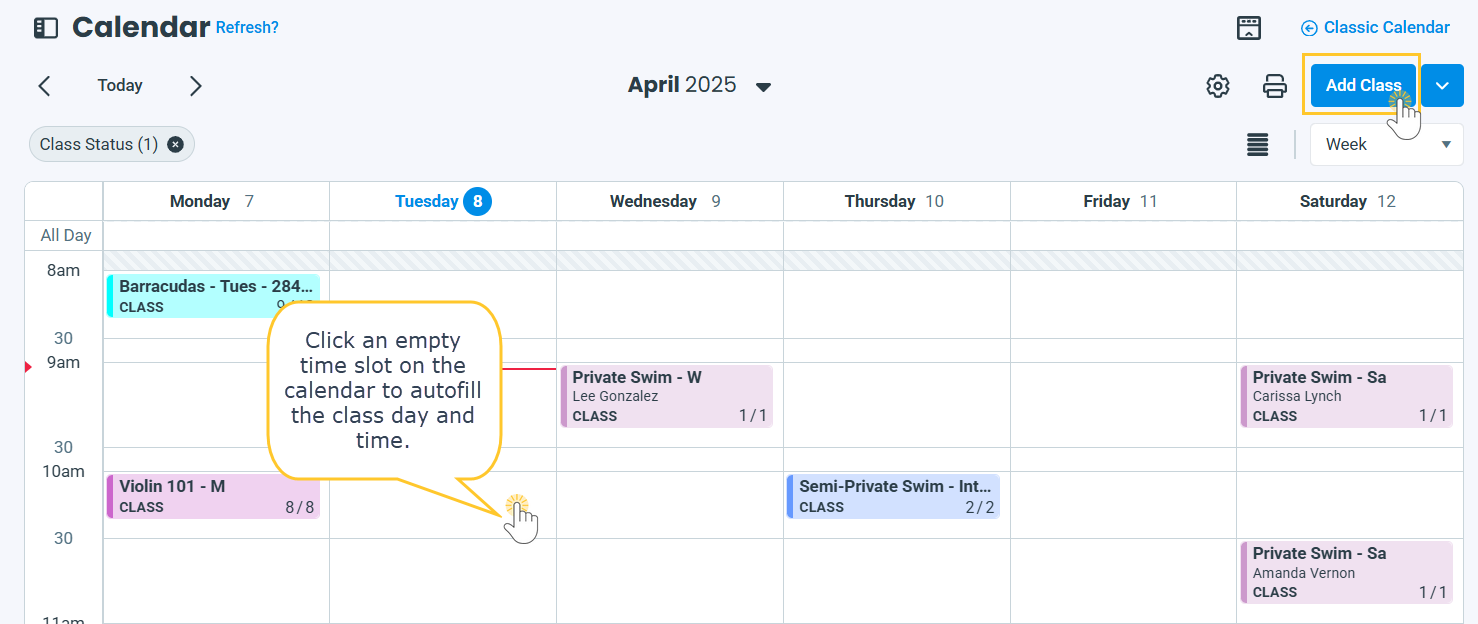
Follow the steps below to add a new class from the Activity Calendar, which displays all active classes at a glance making it easy to identify open time slots and avoid scheduling conflicts!
- Use the Calendar link in your Jackrabbit system's header to access the Activity Calendar.
- To add a new class, select Add Class in the top right corner. Alternatively, click directly on an empty time slot in the calendar- Jackrabbit will automatically fill in class details, such as the selected day and time.
- In the Details section, assign a Class Name and Category 1 and fill in any additional details that will help with reporting and filtering. If needed, create a new Category 1 value and Instructor from their designated drop-down menus (User Permissions required).
- Adjust the Timeframe details: enter the class Start Date and End Date, choose the Active Days the class meets, and specify the Start Time and End Time.
Tip: When adding a class, be sure to assign an instructor, classroom, meeting days, and times to enable Jackrabbit's conflict detection. If any scheduling issues are found, you will be alerted. Click on the notification to view the conflicts.

- In the Pricing section, enter the Tuition Fee, select the Billing Cycle and Billing Method, and adjust any additional pricing options as needed. These settings determine how and when families are charged.
- Use the Less/More toggle to expand or hide additional optional data fields based on preference.
- Additional Information: View and edit class age requirements, size, and policy groups.
- Media: Assign camera groups for Spot TV (if applicable) and upload class resources.
- Additional Settings: Set the visibility and enrollment preferences. Choose whether to display the class in Online Class Listings and/or on student schedules in the Parent Portal. Then, decide if the class is available for Online Registration, Parent Portal enrollments, makeups, and trials.
Clear the Display in Portal Student Schedule checkbox to hide classes from the My Schedule section in the Parent Portal.
- Click Save to add the new class. To continue adding more classes, use the dropdown to choose Save & Add Another Class or Save & Copy Class.


Frequently Asked Questions
Q. Why don't I see the Add a Class button?
A. You may be missing the permission required for these workflows. There are several permissions related to using the activity calendar. Review our help article User Permissions for the Activity Calendar.