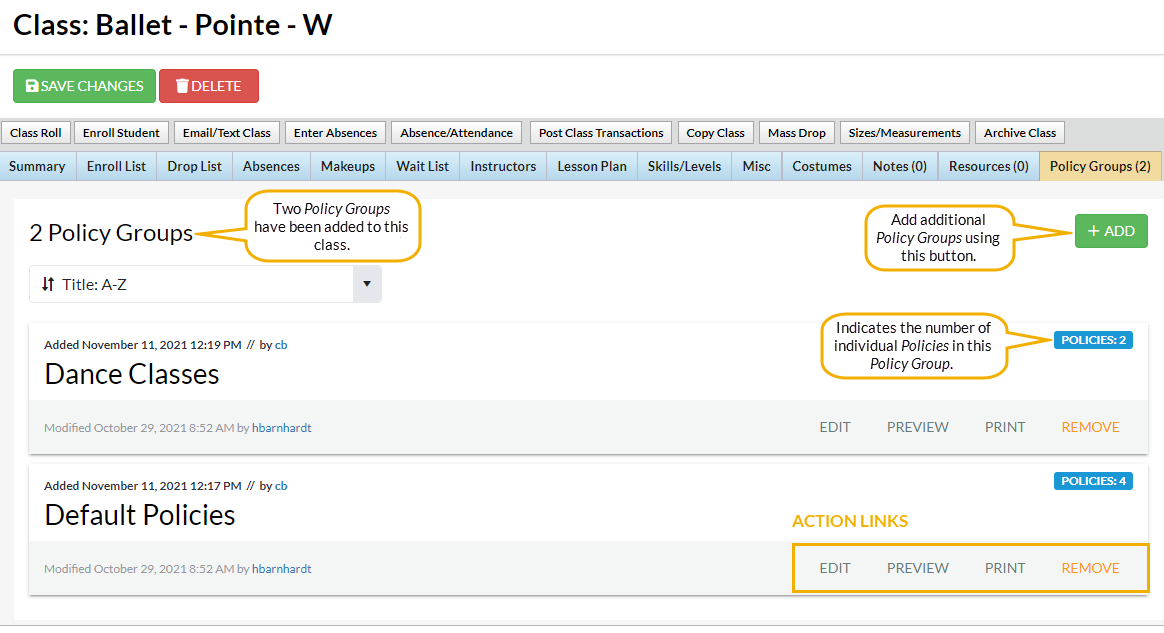
To complete the setup for your Policies, the Policy Groups need to be assigned to classes.
You may have a Policy Group that needs to be assigned to all classes, e.g., Default Policies (Release of Liability, Assumption of Risk, Medical Emergencies, and Payment Policies). Depending on your organization and the programs offered, you may need to assign additional Policy Groups for summer camps, special events, travel teams, competitions, etc.
Add a Policy Group to Classes
- Go to Classes (menu) > All Classes.
- Select the classes that need Policy Groups. Leave the 1st column blank to select all the classes in the grid.
- Click More (icon)
 > Add Policy Groups.
 - Click in the Select all groups that apply field. The previously created Policy Groups will populate in the list. Select all that apply.
- Click Add. The Policy Groups you selected will be assigned to the classes.

- Use the action links to modify the Policy Group when needed:
- Edit - opens the Edit Policy Group page to make changes.
- Preview - opens a Preview window with a list of the individual policies in the group. Use the link to open the policy for review and to print.
- Print - opens a print window with all the individual policies listed in that Policy Group. There is a place for initials and a signature line on the page.
- Remove - click to remove the Policy Group from the class. The Policy Group remains available in the Policy Group tab located under the Gear icon > Settings > Policies > Policy Groups. This does not delete a Policy Group for future use.
Remove Policy Groups from Classes
Policy Groups can be removed from multiple classes (en masse) or from a single class.
- Remove from Multiple Classes - select the classes to update from the Classes menu > All Classes and click the More icon
 > Remove Policy Groups.
 - Remove from All Classes - go to the Gear icon > Settings > Policies > Policy Groups tab, click the row menu
 for the Policy Group assigned to the class, and select Remove from all classes.
 - Remove from a Single Class - open the Class record > Policy Groups tab and click Remove.
If you require your customers to agree to all class policies with each enrollment, you'll need to update your Parent Portal setting related to Policies. Go to the Gear icon > Settings > Parent Portal > Settings (tab) > Class Enrollment Settings section. Select the checkbox for the Require policy agreement for each enrollment setting. When the checkbox is not checked (the default), parents won't be prompted to reagree to the policies unless they have changed.

 for the Policy Group assigned to the class, and select Remove from all classes.