After you have created your policies, it's time to assign them to Policy Groups. Individual policies can be assigned to one or more Policy Groups as needed.
Things to note about Policy Groups:
- Create up to 30 Policy Groups.
- Policy Groups can be created to require parental agreement even without enrollment.
- Reorder the Policies within a Policy Group using the drag-and-drop method in the grid.
- Update and remove groups as often as needed.
- A Policy Group name is limited to 60 characters.
Create a Policy Group
Follow these instructions to create a Policy Group and add individual policies to that group:
- Go to the Gear (icon) > Settings > Policies > Policy Groups (tab).
- Select a Default Policy Group from the drop-down menu for parents to agree to, even when there is no enrollment.
- Families who log in to their Parent Portal with no class enrollments will be required to agree to the Default Policy Group.
- Families enrolled in classes with Policy Groups assigned to the class will be required to agree to the assigned Policy Groups.
- Select None if there are no policies to agree to when there is no class enrollment.
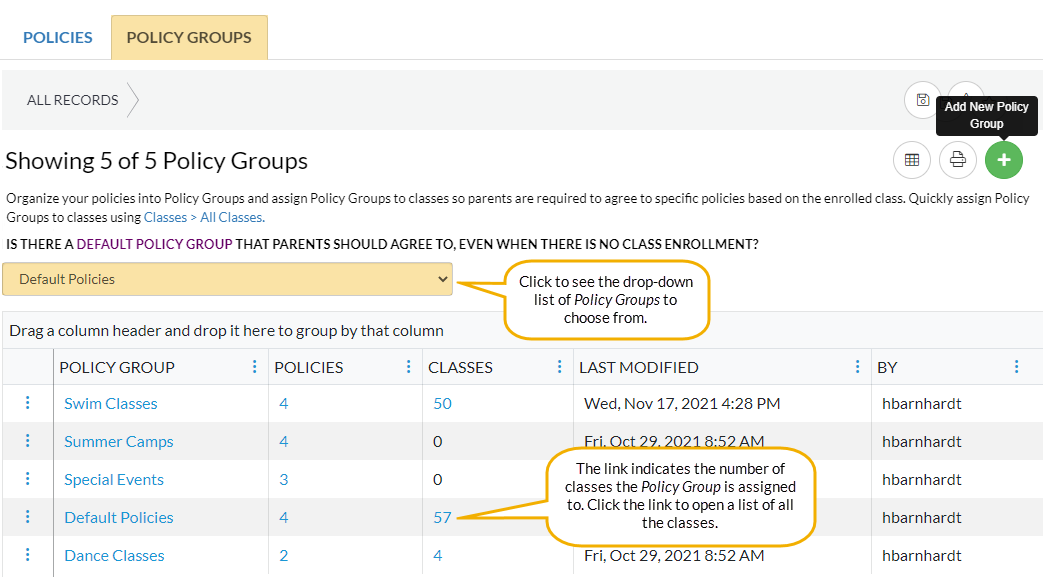
- Click Add New Policy Group (icon)
 to open a New Policy Group page.
- Enter the Name of the Policy Group.
- Click Add a Policy to this group (icon)to open the Add policies window. Start typing in the Select existing policies... field and the individual policies you previously created will populate in the drop-down list.
- Select an existing policy from the drop-down list or click Create Policy to add a new policy.
- Select as many policies as needed for the group you are creating.
- Click Add to Group.
- Your Policy Group has been created.
- Click Save Policy Group.
- Your Policy Group has been saved and will be listed in the Policy Groups (tab).
- Assign Policy Groups to Classes.

Save time and effort each time you open a Policies grid page to view your data! After you adjust and select your columns save the grid as a Favorite.
Edit a Policy Group
- Go to the Gear (icon) > Settings > Policies > Policy Groups (tab).
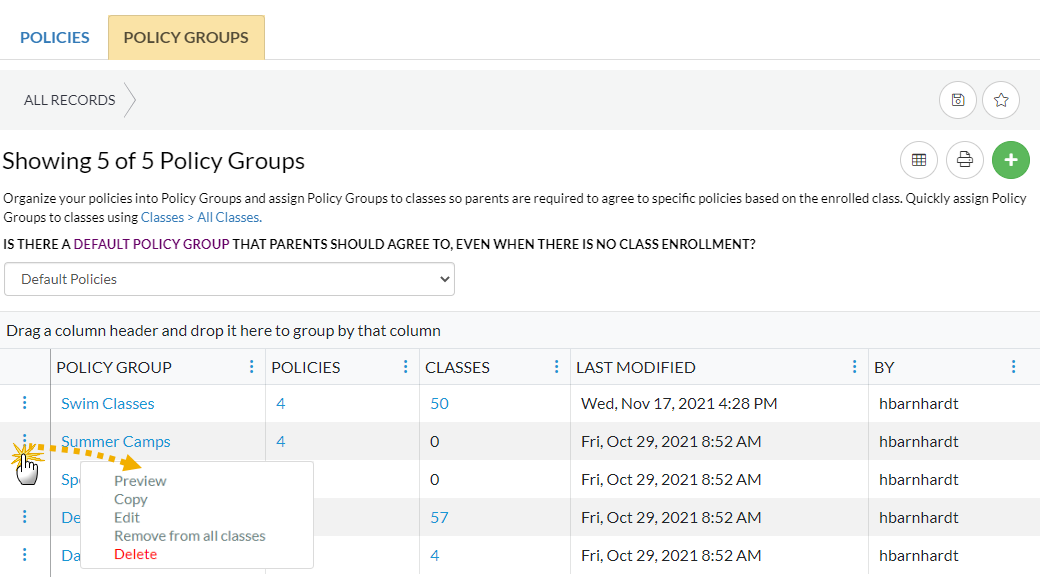
- Click a Policy Group name to open the Edit Policy Group page and modify the Policy Group, or click the row
 menu to take one of the following actions:
- Preview - opens a preview window of the Policy Group. Use the links to view the individual policies.
- Copy - click and an exact duplicate of the Policy Group will be created and placed at the top of the grid.
- Edit - opens the Edit Policy Group window to make changes as needed.
- Remove from all classes - if the Policy Group is assigned to any classes, it will be removed.
- Delete - this will delete the Policy Group, however, the individual policies will not be deleted. Note: A Policy Group can't be deleted if it is assigned to a class regardless of the class status.
- Click Add New Policy Group (icon)to add a New Policy Group to the list.

 menu to take one of the following actions:
Reorder Policies in a Policy Group
If you want to reorder the Policies after you have added them to a Policy Group, use the drag and drop icon to move the Policies from one position to another.
- Go to the Gear (icon) > Settings > Policies > Policy Groups (tab).
- Click the Policy Group that needs to be reordered. This opens the Edit Policy Group page.
- Click the Policy name and immediately drag it up or down to reorder it.
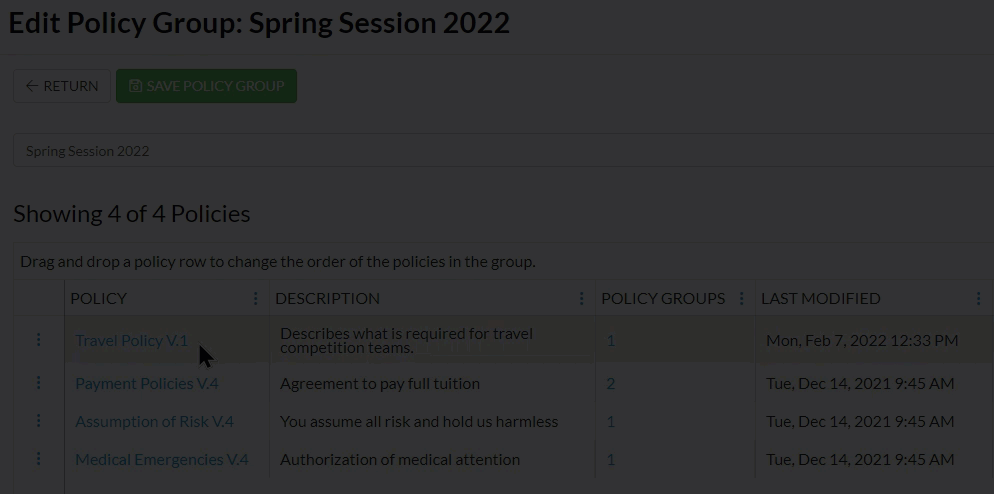
- Click Save Policy Group when done.

Use the Print icon![]() to print the Policy Groups listed in the grid or create a PDF.
to print the Policy Groups listed in the grid or create a PDF.