After adding your performances, you'll add classes and students to the performances:
- Go to the Activities menu > Events > Recitals.
- Click on a Recital Name on the Recital Listing page to open the Recital Editor.
- In the Recital Editor, you'll see a Select a Class column on the left.
- Classes are grouped first by Location, then by Category 1.
- Click any plus sign [+] or double-click any Location and Category to display classes.
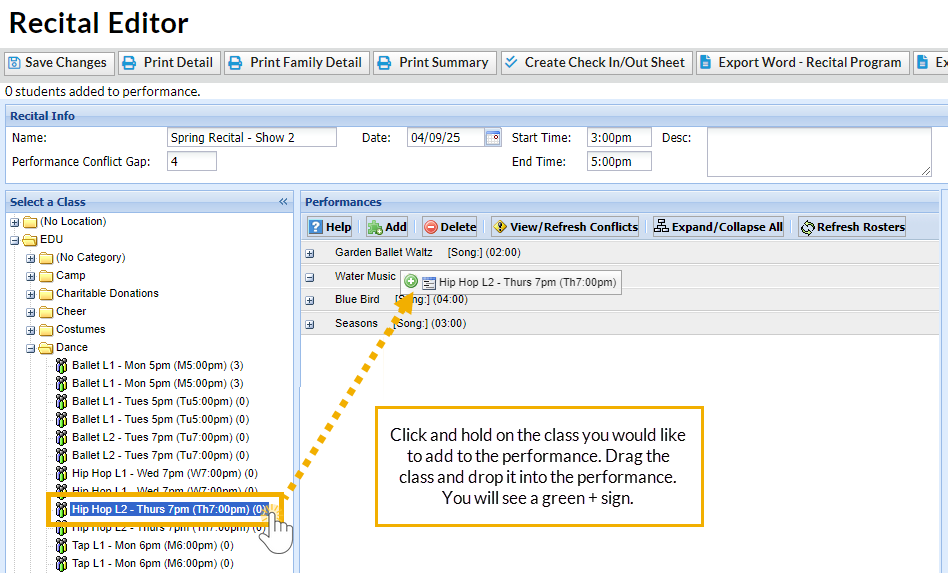
- Click any class name in the Select a Class column and drag it to a performance in the Performances column.
- Click Save Changes. More than 1 class can be added to a single performance.
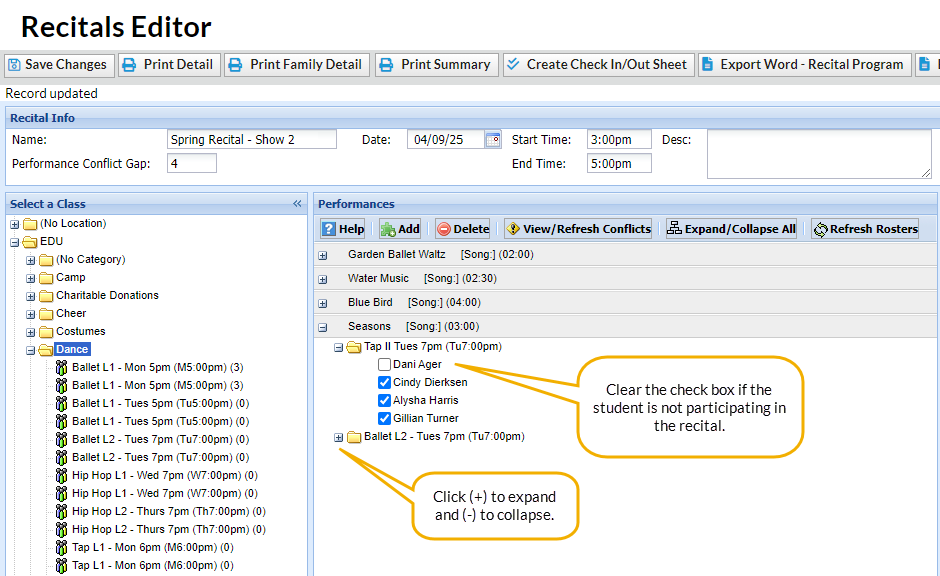
- After a class has been added to a performance, click the [+] sign next to the performance to view the class. Click the [+] sign next to the class to view the students. To view all performances and classes, click Expand/Collapse All.
- To remove a student from a performance, clear the checkbox next to the student's name.


When you have added all of your classes (students) to the performances in your recital, you are ready to finalize the recital.