There are multiple ways to post additional fees (other than class fees) to a specific family:
- Select one of the options listed in the table below to start the post fees procedure:
From a Family Record
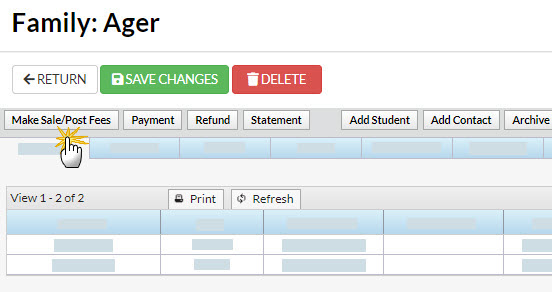
Go to Families (menu) > All Families and select the family you want to post a fee to or search for a family using the global search at the top of the page.Once the family page is open click the Make Sale/Post Fees button. Proceed to step 2.
From All Families
Go to Families (menu) > All Families > select a Row menu for a family. Click Post Fees in the drop-down menu. Proceed to step 2.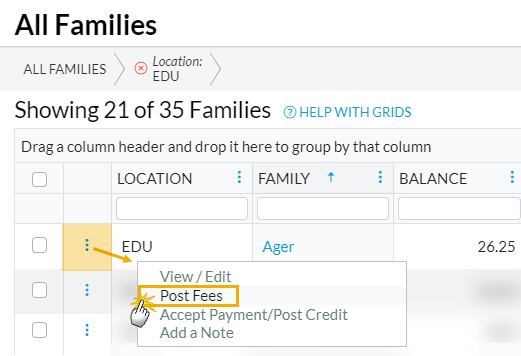
From the
Transactions Menu
Go to Transactions (menu) > Post Transactions > Make Sale/Post Fees, this will open the Make Sale/Post Fees page. Proceed to step 2.
- Complete the Family Details section.
- Search for a family name if you used the Transaction menu to access the page.
- The family will automatically populate if you started from a Family Record.
- Change the Transaction Date when applicable.
- Complete the Select Store Items if you have any store fees to include. See Make a Store Sale for details.
- Complete the Post Fees section.
Note: You can add an unlimited number of fees. Additional rows will display after the third fee is added.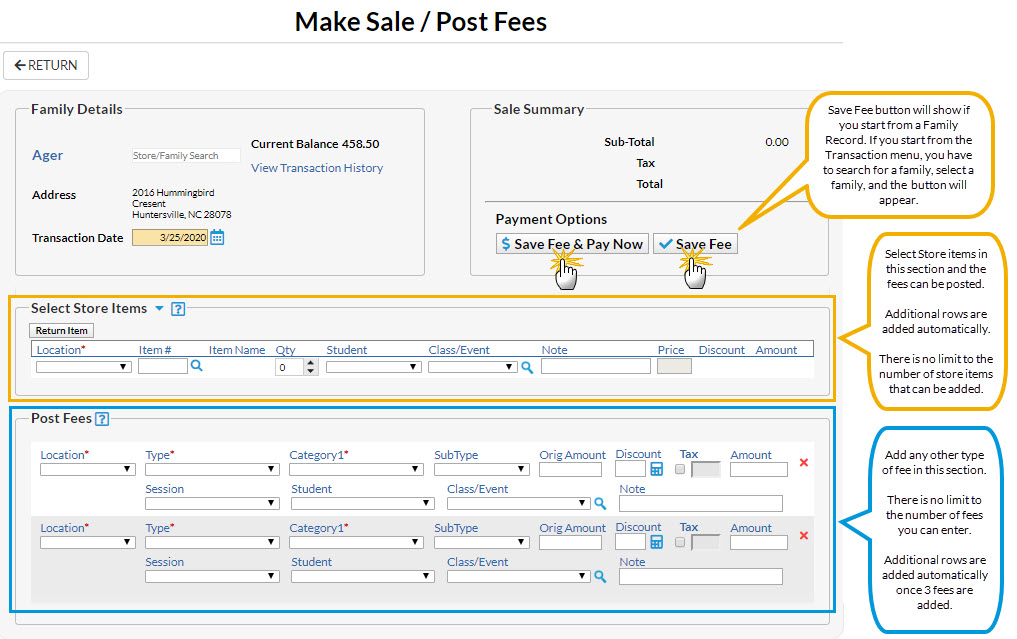
- Location if applicable.
- Type (Transaction).
- Category1 (Note: Category 1 is required if you have Require Cat1 = Yes (Gear menu > Settings > General > Organization Defaults > Transaction Settings). Jackrabbit always recommends you include a Category 1.
- SubType and enter the Orig Amount.
- Click the Calculator icon to enter a discount if applicable.
- Include tax by checking the Tax checkbox.
Note: The tax rate is calculated using the tax rate you entered and saved under the Gear (icon) > Settings > General > Organization Defaults (left menu) > Tax Settings. - Choose a Session (optional, but highly recommended).
- Choose a Student (optional).
- Select a Class/Event from the drop-down if the fee is tuition-related, or click the Magnifying Glass (Search) icon to select a Class/Event. If you add a class to this field, notice that the Category1 field adopts the Category1 assigned to that class. This is a safeguard to ensure the correct Category1 is used for the class tuition.
- Add a Note (optional).
- Click either the Save Fee & Pay Now button to save the fees and open a payment screen or the Save Fee button to save the fees without posting a payment.


