An Event with the Status = Notice allows your organization to add viewable information to your Event Calendar that does not allow registration. For example, you can add an announcement that your facility will be closed on a specific day.
Add an Event Notice
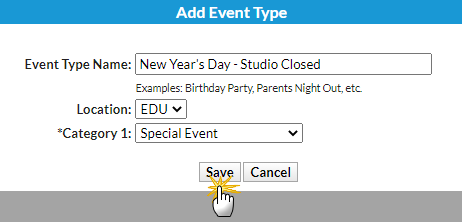
- Go to the Activities menu > Events > Add Event Type.
- Add an Event Type Name. Category 1 is not relevant since this event won't allow for enrollment or revenue, however you must enter one.
- Click Save.
- When the Event Type page opens, complete the following:
- Give the Event Type a Name
- Set Display on Internal Calendar to Yes
- Select a Background Color (click on the crayon icon
 to open the color picker)
 - Select the drop-down Open & Booked Dates for Display to Customers
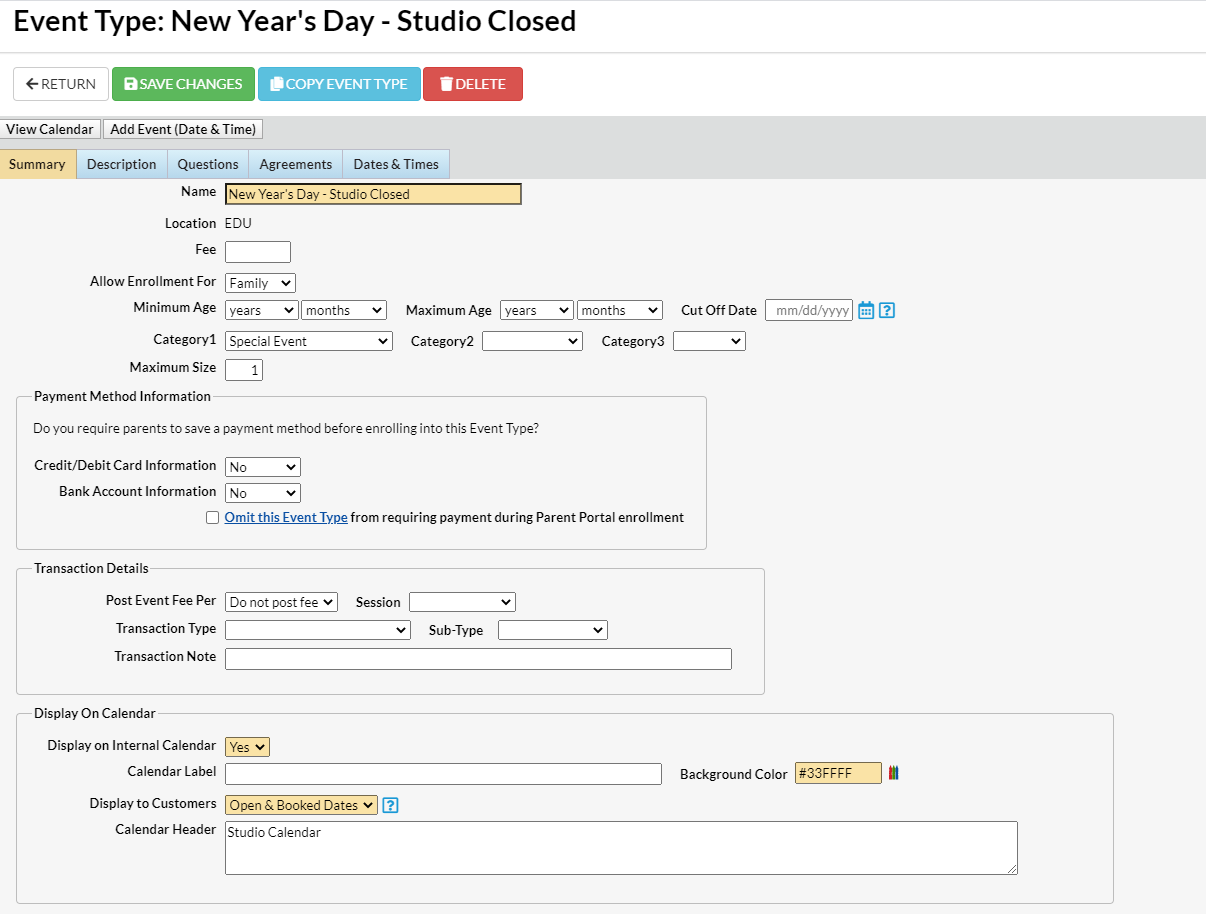
- Click Save Changes.
- Click the Add Event (Date & Time) button.
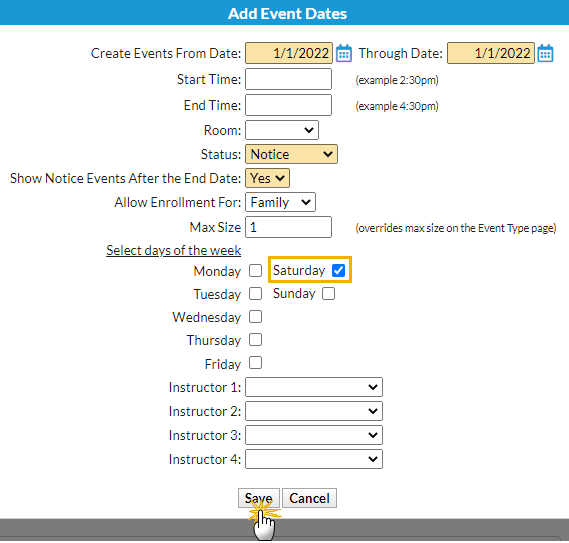
- Add the specific date and select Status = Notice.
- Select Show Notice Events After the End Date = Yes to keep the Notice on the Calendar after the date has passed; leave as No to have the event removed from the Calendar after the event date has passed.
- Click Save.

 to open the color picker)

Event Calendar
The Notice displays on the Event Calendar, however, the event is not a clickable link that opens a registration form.