Book an Appointment Instructional Video
Jackrabbit provides a free generic Appointment booking instruction video called Book an Appointment in the Portal. This video (2:13) showcases how book single and recurring appointments in the Parent Portal.

|
|
 Watch the video
Booking appointments like private lessons, evaluations, or one-on-one sessions is simple in the Parent Portal. Once Appointment Types are available, you will see time slots that match your student’s schedule and staff availability. Just log in, choose an appointment, and reserve a spot in seconds!
- From the Dashboard, access Appointments in the Parent Portal in two ways:
- In the Looking for activities? section, select the Browse button > Appointments.
- From the Activities menu option, select the Find Appointments tab.
- On the Find Appointments page, available appointment types automatically display across all Business Locations (if offered). Turn off the All Locations toggle to view only those available at your location.
Note: Use the Sort By filter to sort results alphabetically (A-Z or Z-A).
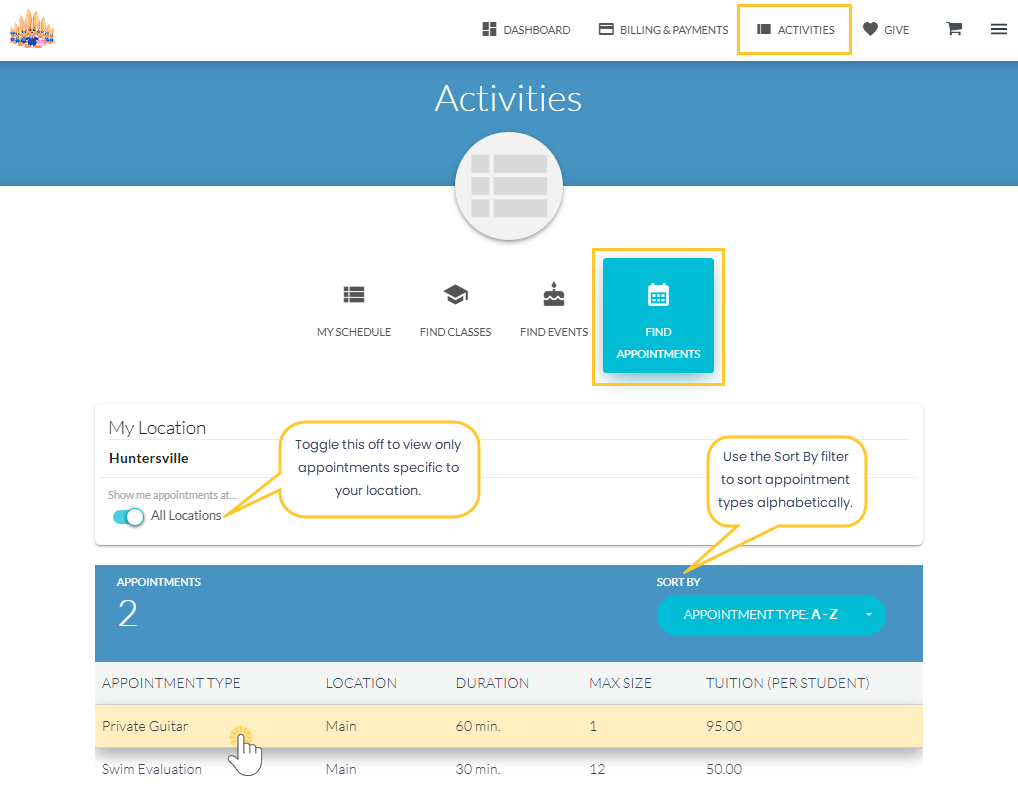
- Choose an Appointment Type from the list to open the Book Appointment page and view more details.
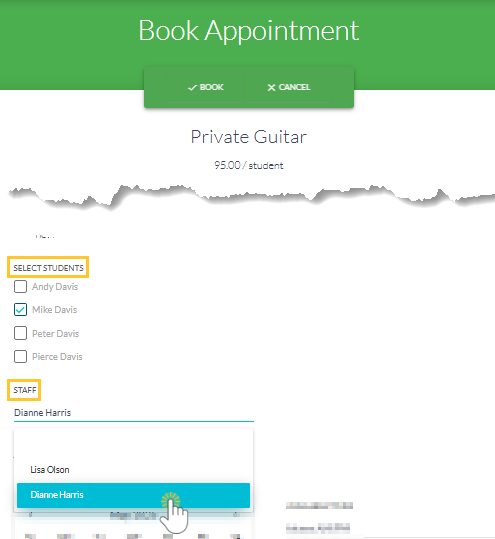
- In the Select Students section, select the checkbox next to each student to include in the booking.
Note: If the number of selected students exceeds the spots available, a prompt labeled Max size exceeded will appear. - Select a Staff member from the drop-down list to view available appointment dates and times for that instructor.
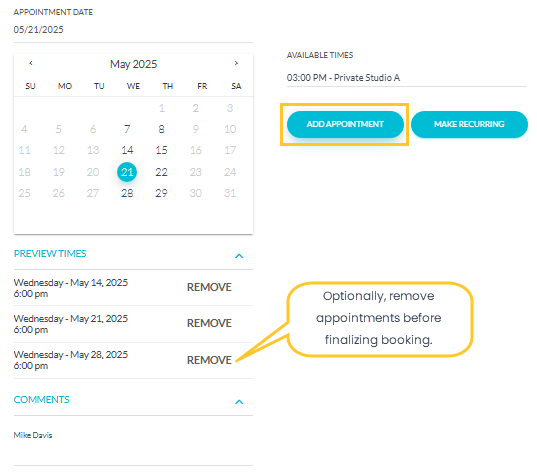
- Choose an Appointment Date from the calendar. Only dates with available time slots will be active. Availability is based on the student's schedule, staff assignment, and room availability. Dates with no availability are disabled.
Note: If multiple staff members are associated with the Appointment Type, use the drop-down to select a different staff member to explore other availabilities. - After choosing an Appointment Date, select a time from the Available Times drop-down. If no suitable time slot is available, try selecting a different date.
- For a single appointment, simply select the date and time, add a comment in Step 9, and then complete the process by booking the appointment.

- For a single appointment, simply select the date and time, add a comment in Step 9, and then complete the process by booking the appointment.
- Optionally, if recurring appointments are available, select the Make Recurring button below the Available Times. This allows you to book multiple time slots for an appointment at one time. Based on your selections, a list of recurring options will display, including any conflicts and their reasons. You can remove or adjust as needed.
- Select a frequency from the Repeats drop-down list (e.g., Every Day, Every Week).
- In the Ends section, choose how the recurrences should end to generate a list of Recurring Times - either by number of appointments or by a specific end date:
- Select After and enter the number of recurrences to end after a set number of appointments.
- Select On and choose a specific end date.
- Click Remove to clear any appointments that are highlighted for conflicts or don't work for you. If there is a conflict - like a scheduled activity, closure, or staff unavailability - you will see an alert, and the appointment will not be added.
- Select the Add Recurrences button to preview the selected appointment times.
- In the Preview Times section, review the selected dates before booking.
Note: Add or remove appointments as needed. Choose individual dates and times and select the Add Appointment button, or create additional recurring patterns across different dates and times.
- Select the Comments drop-down to leave a comment for each student in the booking.
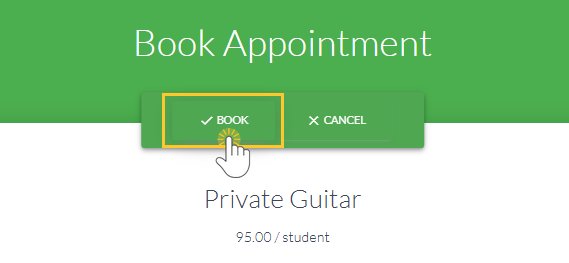
- Scroll to the top of the Book Appointment page and select Book to finalize your appointments.