Permissions control the ability of your Users to see certain data and take specific actions. Before moving forward, review User Permissions for All Families.
All Families, located in the Families menu, generates a list of all active and inactive Family records in Jackrabbit. Lead File families are not included.
- Use optional data visuals to view key information at a glance with interactive charts.
- Drill down to specific families using filters organized in a slide-out filter drawer.
- Save your favorite view (filters, selected columns, etc.) as your default view.
- Display a list of families in a powerful grid: you can group, sort, and customize the information.
- Take Action - add a new family, send a message, work with a single family, or apply a mass action to multiple families at once.
Sample All Families Grid

- Breadcrumbs display the currently selected filters.
- Data Visuals provide family information at a glance.
- Open filters (filter drawer), Save as favorite, Favorites, Hide/Show Data visuals.
- Adjust columns, Send a Message, Refresh Grid, Add New Family, and More.
- Column Search - enter a search term in the search field.
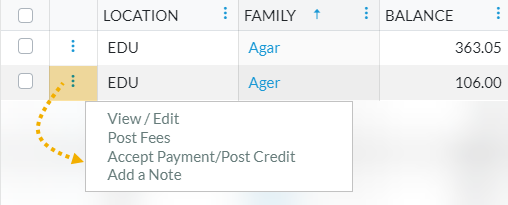
- Row Menu - use the row menu to perform an action for an individual family.
Click the Adjust columns icon to squeeze the grid columns closer together. You will be able to see all the columns in the grid.
Data Visuals - Key Information at a Glance
Data visuals (charts) provide a quick view of key information about your families. The elements included in the data visuals are predefined by Jackrabbit.
The All Families data visuals are interactive and can be hidden. Use the Hide/Show Data visuals![]() icon to toggle back and forth.
icon to toggle back and forth.
|
Locations
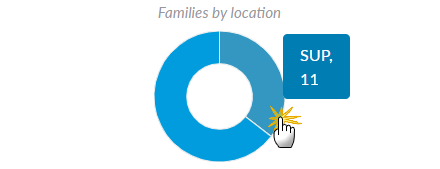 |
If you have multiple Locations in Jackrabbit, this element will display the proportion of families in each Location.
|
Status
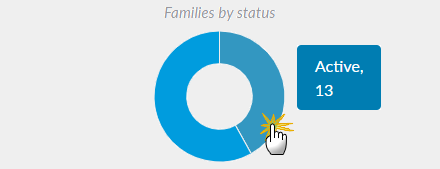 |
The number of active versus inactive families is shown in this data visual.
|
Accounts Receivable
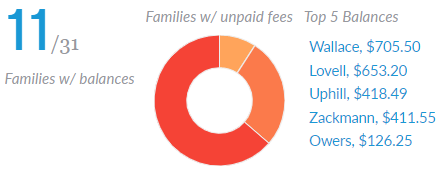 |
The number of families with unpaid fees (Accounts Receivable) will display as a fraction of all families, e.g., 11/31. The chart breaks those families down by the age of the fees owed.
|
Policy Status
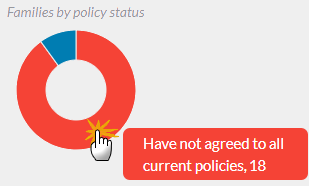 |
The chart breaks down all families by the status of their signed legal policy agreements: - Have agreed to all current policies
|
ePayment Status
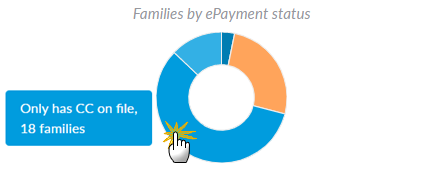 |
Families are grouped by the ePayment method on file: - Has both CC and ACH
|
Use Filters to Search for Specific Families
Select the Filter icon to open the Filter Drawer. The Filter Drawer houses various criteria to help you drill down to specific families, for example, to list all inactive families or find families with more than two students.
Each filter you select will narrow the results down further.

- Once filters are selected and applied, they will appear in the breadcrumbs. Use the red x next to a filter in the breadcrumbs to clear it and refresh the displayed families.
- Filters are grouped and organized into sections for ease of use and pull information from the various tabs in the Family record.
- Use the arrow (>) to expand a section to see the filters within, or use the Expand All/Collapse All option at the top of the Filter Drawer.
- Search for a filter by entering a keyword in the search box at the top of the Filter Drawer. For example, enter "ePay" to quickly locate and navigate to the ePayment Method filter in the Financial Details section.
- Select date fields by clicking on the calendar icon or manually enter dates.
Save your Favorite Filtered Grid Views
Save time and effort each time you open a grid page to view your data! After you have applied filters or clicked on a data visual, set the grid column widths, and you can save the filtered data as a Favorite.
Saved favorites can be set as a default view and shared with other Jackrabbit Users in your organization. There is no limit to the number of filtered grid views you can save.
|
Save a Favorite |
Once filters are selected, it's simple to save your favorite views:
|
| Open a Favorite |
Load or open a saved favorite:
If you opened a saved favorite grid view and would like to make it your default view, resave it as a favorite and toggle the Make this your default view? to the right. Click Save. |
| Delete a Favorite |
If you created a Favorite, you will be able to delete it:
|
Contact Jackrabbit Support if you want to delete a Favorite filtered view created by another User.
Work with the Information in the Grid (Table)
Jackrabbit grids, located throughout the system, are very powerful and allow you to group and sort your data to customize how your results are displayed. Each grid has core features, such as grouping data by dragging a column to the grouping bar. Row menus and column menus offer different options depending on the grid.
Learn more about working with grids.
Use Column Search to quickly find information in a column. For example, enter a family last name or part of a name, and all the matches will populate in the grid. Use the red x to clear the information in the search field.
Add a New Family
Use the Add New Family (icon)![]() to open the Add Family window. We recommend you always select the Use Quick Registration Form button whenever possible. This allows you to add all the new family information, including students, and sign them up for classes at the same time.
to open the Add Family window. We recommend you always select the Use Quick Registration Form button whenever possible. This allows you to add all the new family information, including students, and sign them up for classes at the same time.
You also have the option to add a family account 'on the fly' with just their name, location, and registration date when you click on the Enter Family Name Only link.

To accommodate different workflows, the Quick Registration form can also be accessed directly from the Families (menu).
Take Action for an Individual Family
Use the row![]() menu to edit that row and access options for working with an individual family. Click on the icon, and a new browser tab or pop-up window will open depending on the action you select.
menu to edit that row and access options for working with an individual family. Click on the icon, and a new browser tab or pop-up window will open depending on the action you select.
Click directly on the row menu![]() for the family you want to work with; do not use the checkbox in the 1st column. When any checkboxes (for use with mass actions) are selected in the 1st column, the row menus are deactivated and won't display.
for the family you want to work with; do not use the checkbox in the 1st column. When any checkboxes (for use with mass actions) are selected in the 1st column, the row menus are deactivated and won't display.
- View/Edit - opens the Family record
- Post Fees - opens the Make Sale/Post Fees page
- Accept Payment/Post Credit - opens the Payment Transaction Entry page
- Add a Note - opens the Add a note window

The Send Message (icon)![]() can be used to send emails, text messages, and push notifications (through the Jackrabbit Plus mobile app) to individuals or multiple families.
can be used to send emails, text messages, and push notifications (through the Jackrabbit Plus mobile app) to individuals or multiple families.
Take Action for Multiple Families (Mass Actions)
Choose one of these options to select families and perform a mass action:
- Select all families - leave the checkbox in the 1st column unchecked, and all families in the grid are selected. You will be able to Send a Message, Refresh the Grid, Add a New Family, and perform all the mass actions in the drop-down list, including Print and Export to Excel.
- Select specific families - in the 1st column, select the checkboxes for the families you want to work with. You will be able to Send a Message and perform all the mass actions in the drop-down list shown.

- Current families displayed on the page (max. 250/page) - select the checkbox in the 1st column header. You will be able to Send a Message and perform all the mass actions in the drop-down list shown below.

Mass Actions
|
|
Send a Message - Choose to send an email, push notification, or text message to chosen recipients in the selected records, e.g., Primary Contacts only or Primary, Billing, and Other Contacts.
|
|
|
ePayment Schedule - Update the ePayment Schedule (choosing from a drop-down list) or remove the existing ePayment Schedule from the selected Family records. Click Update. |
|
Family Discount - Update the Family Discount (amount, expiration date, and discount type) or remove the existing Family Discount from the selected Family records. Click Update. | |
|
Family Fixed Fee - Update the Family Fixed Fee (amount, expiration date, and Category 1) or remove the existing Family Fixed Fee from the selected Family records. Click Update. | |
|
Membership Type - Update the Membership Type (choosing from a drop-down list) or remove the existing Membership Type from the selected Family records. Click Update. | |
|
Clear UDF Answers - Clear the User-defined fields for the selected families. Click Clear. | |
|
Print - Open a print window to print the family information in the grid (max. 250 rows) or save it as a file for future use. The print option is only available when the checkboxes remain unselected in the 1st column of the grid. | |
|
Export to Excel - Download an Excel file of all the filtered information in the grid to your computer. The export option is only available when the checkboxes remain unselected in the 1st column of the grid. All families in the grid will be included (no maximum). |
Family information in the All Families grid lives in the Family record. Click a Family link in the grid to open the family's individual record.