Organization Defaults set your preferences for various areas of Jackrabbit. Several defaults control how Jackrabbit behaves, e.g., whether or not future enrollments are allowed or the rules for class makeups. Others control how some fields display, e.g., the student age format (month/year or year only).
To edit these settings, go to the Gear icon > Settings > General > Organization Defaults (left menu). They have been organized into sections according to the areas of Jackrabbit they affect.
Default Email Addresses
 Click here to watch a short (35 sec) video tutorial on Default Email Addresses.
Organization Email
Your Organization Email is also listed on the My Account page (Gear icon > Account). Any changes made to this field will also update the email address on the My Account page.
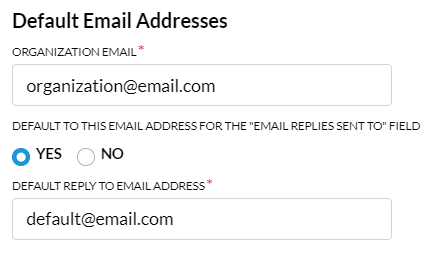
Default Reply to Email Address
- When Yes is selected for the Default to this Email Address for the "Email Replies Sent to" Field setting, the address listed in the Default Reply To Email Address field will be the default recipient for email replies. However, a different email address can be selected from the drop-down list in the email composer (User ID, Location, and Organization emails).
Example of this option in the email editor: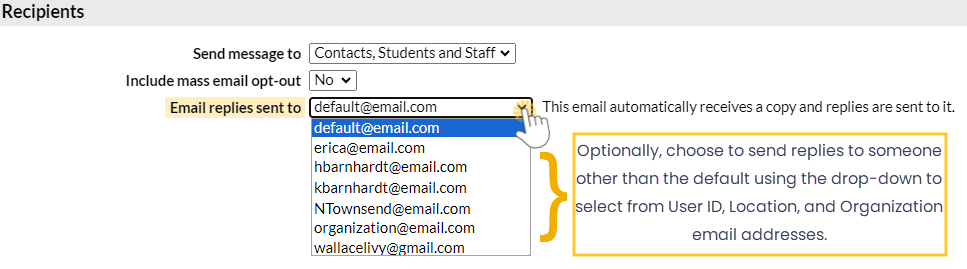

- When set to No, the email address of the User ID sending the email will be used as the recipient for replies to the email.
Notes:
- Exceptions: The Default Reply to Email Address does not apply in areas of Jackrabbit that have specific fields for designating where email replies are sent (ePayment Receipt Reply to Email, Staff Portal Reply to Email, Parent Portal Reply to Email, and Text Message Notification Email).
- A User must have the User Permission Edit Settings, Logo, and Announcements (Tools category) to assign a Default Reply to Email Address.
- The Default Reply to Email Address field can only hold one email address; multiple email addresses cannot be added here.
Registration Form Defaults
Registration Form Defaults affect both your Quick Registration and your Online Registration forms.

These fields are pre-filled on Jackrabbit's registration forms. Note that pre-filled fields can be changed as needed.
- City, State, Zip/Postal Code, and Area Code defaults can be added to save time during registration. Skip this step if your organization spans several cities, zip codes, etc.
- Allow Portal Access for 2nd Contact defaults to Yes. To restrict access to the Parent Portal to only one contact in the Family record, change this to No.
Tax Settings
Tax Settings include settings for your Tax ID Label and options for charging taxes on fees and services.

Tax ID Label and Tax ID Number
Add your organization's tax information to have it included on all receipts and statements issued from Jackrabbit. This information is helpful for your customers who submit receipts for tax purposes and reimbursements.
The Tax ID Label is displayed before the tax ID number on the receipts and statements. Select one of the options in the drop-down list for the type of tax number to enter. Note: Once a Tax ID Label has been selected, the Tax ID Number field becomes a required field.
- In the United States, the tax number is called the EIN (Employer Identification Number).
- In Canada, the tax number is called the BN (Business Number).
- In Australia, New Zealand, and the UK, the tax number is called the TIN (Taxpayer Identification Number).
The tax label information is shown to customers on statements, receipts, ePayment receipts, and Parent Portal printed transactions.

Tax Settings for Fees & Services
Jackrabbit allows you to enter a default tax setting for fees and services.
- Make Sale/Post Fees: Add tax in the 'Post Fees' section
Set this to Yes to calculate tax automatically in the Make Sale/Post Fees window, Post Fees section. The Post Fees section is used to post any type of fee, including non-service fees (goods/products/merchandise). Users on the Make Sale/Post Fees page can clear the Tax checkbox to override this tax calculation if needed.
- Tax Tuition Fees
Set this to Yes only if you tax tuition (class fees).
- Tax Registration Fees
Set this to Yes only if you tax registration fees.
Tax Rate and Tax Label
The Tax Rate should be set to the appropriate tax rate percentage (Example: 8.7500).
The Tax Label will appear in sections of Jackrabbit where a tax is applied to identify the charge (e.g., Sales Tax, GST, etc.). If you don't enter a label, Jackrabbit will use the word Tax in areas where a label is generated.
Transactions Settings
Transaction Settings determine the defaults for when you are posting fees and recording payments.

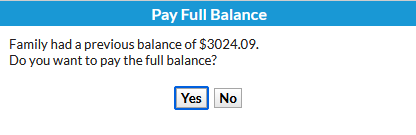
Prompt for Balance Payoff
Set to Yes to prompt Jackrabbit Users to ask if the family wants to pay their full account balance when accepting payment with the Save Fee & Pay Now button in the Make Sale/Post Fees window. When Yes is selected, the Payment Transaction Entry window will auto-fill the Payment field with the full account balance instead of only the amount of the fee just posted.
Note: The User can edit the Payment field if Yes is selected in error.
Apply Payments To
This setting determines what order payments are applied to fees as a default when making individual payments (in the Payment Transaction Entry window) or batch ePayments (Process ePayments window). This default can be changed at the time of posting if needed.
The selection you make here will affect the Aged Accounts metrics on your Executive Dashboard, customer statements, and other reports on customer account balances. We recommend leaving this set to Oldest Fees First. In most cases, customers pay fees in the order they were incurred, so the first payment is applied to the first posted fee.
Reach out to Support before changing this setting to ensure you understand what effect the change will have.
There are three options to set the default for how payments are applied:
- Newest Fees First - Most recent unpaid fees to oldest unpaid fees on the family's account.
- Oldest Fees First (within last 12 months) - Oldest unpaid fees dated within 12 months to most recent unpaid fees.
- Oldest Fees First - Oldest unpaid fees on the family's account to most recent unpaid fees. Note: It's recommended you select Oldest Fees First so any past due charges are the first to be cleared from the account.
Receipt Settings
Receipt Settings (Gear icon > Settings > General > Organization Defaults left menu) allow you to control the appearance of your printed and emailed receipts.
Changes made to these settings also affect the ePayment receipt settings.
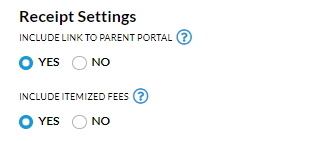
Include Link To Parent Portal
With email receipts that are sent from Jackrabbit, you have the option to include a link to the Parent Portal, which gives your families quick and easy access to their accounts.
Set Include Link to Parent Portal to Yes to have the link to your portal login page included in the receipt.

Include Itemized Fees
Set Include Itemized Fees to Yes to have your receipts include an itemized detail of the fees a payment was applied to. When this is set to No, the receipt will only include the payment amount without listing the fees to which the payment was applied (see the screenshot above).

Student Settings
There are several Organization Default settings that relate to students.
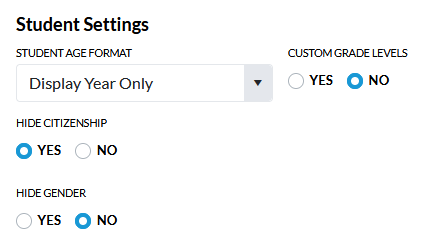
Student Age Format
This setting allows you to choose how you'd like to display student ages in many areas of Jackrabbit. The Display Year Only option will display the student's age in years only. Display Year and Month will display the student's age in years and months.
Custom Grade Levels
Jackrabbit provides a listing of standard grade level fields. However, it is also possible to create custom grade levels. When Custom Grade Levels is set to Yes, you will be able to define custom grade levels to assign to your students.
To define your custom grade levels, go to the Gear icon > Settings > General > Drop-down Lists (left menu). The Grade Levels drop-down is located in the Student section. You will only see the Grade Levels drop-down option if your Student Setting, Custom Grade Levels is set to Yes.
If you choose not to use custom grade levels and use the standard grade levels provided by Jackrabbit, you will have the option to change the grade level for several students at once (mass clear). See Change Student Grade Levels for more details.
Hide Citizenship
When set to Yes, the Citizenship field is hidden on the Summary tab of the Student record.
Hide Gender
This setting allows you to control if you want to show gender options throughout Jackrabbit. The default setting is No. This means you will not hide the gender selection settings; they will display.
Go to the Gear (icon) > Settings > General > Drop-Down Lists (left menu) > Student > Gender to create the drop-down lists for gender.
Set to Yes if you want to hide all references to gender.
Class Settings

Send Enrollment Email to Instructors
If Send Enrollment Email to Instructors is set to Yes:
- An email confirmation will automatically be sent to the primary instructor whenever a student enrolls in a class through Online Registration or the Parent Portal.
- When a student is enrolled from within Jackrabbit, you will be prompted with an option to email the instructor. The checkbox defaults to selected but can be cleared for a single instance.
If Send Enrollment Email to Instructors is set to No:
- No email will be sent to the instructor when a student enrolls through Online Registration or through the Parent Portal.
- You will not see the prompt to email the instructor when enrolling from within Jackrabbit.
Allow Future Enrollments
This setting controls whether Users can enroll students with a future date within Jackrabbit. Note: Future enrollment cannot be done through Online Registration or the Parent Portal.
- When Allow Future Enrollments is set to Yes, Users can manually enroll a student in a class with a start date in the future (e.g., next week or next month). A date field choice will be available when enrolling, allowing Users to select the future start date.
- When Allow Future Enrollments is set to No, all enrollments must occur with the current date as the start date, preventing enrollments with a future start date.
Advance Enroll Date
This setting affects class enrollments done through Online Registration or the Parent Portal.
If Allow Future Enrollments is set to Yes, the Advance Enroll Date (By 1 Day)... setting can be set to Yes to have Jackrabbit automatically advance the enrollment date by one day if someone enrolls on the same day the class meets, but after the class has already taken place. This ensures tuition charges and any prorating are calculated correctly, as missed classes are not included in the prorated amount. It also updates automated messages, like enrollment confirmations, to show the proper first day of class, keeping communication with families and instructors clear.
Enrollments made on the same day as the class but after the class has met will appear in the Future Enrollment section of the Classes tab in the Student and Family records. These enrollments will automatically move to the Current Enrollment section the following day.
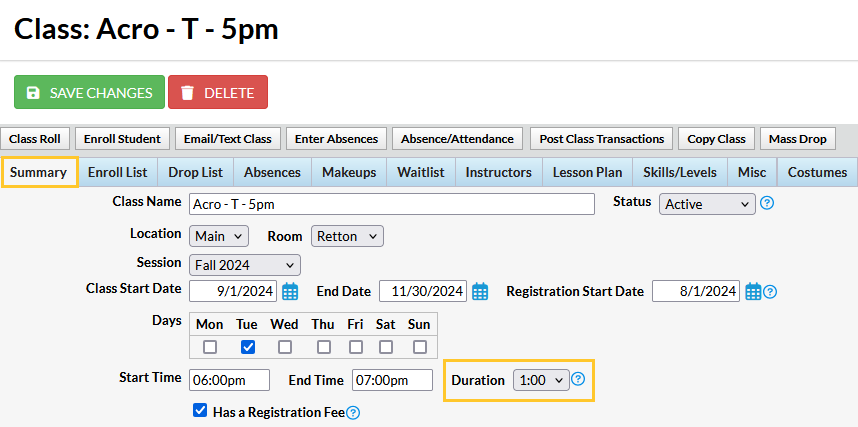
Calculate Class Duration
This setting controls whether or not the Duration field on the Summary tab of the Class record is automatically calculated when the times are entered. Set this to No if you want to manually complete that field; for example, set this to 1 and count the class as one unit regardless of its length.
Warn If Enrolling Students Outside of Age Range
Set Warn if enrolling students outside of age range to Yes to provide a pop-up warning for a Jackrabbit User when a student is enrolled in a class outside the defined Min Age and/or Max Age (Class record > Summary tab).

Prompt to Update Fixed Fee with Enrollment Changes
When a family or student has a Fixed Fee in place, Jackrabbit can alert you when an enrollment change is made so that you can update the Fixed Fee. Set Prompt to Update Fixed Fee with Enrollment Changes to Yes to be alerted that the student enrolled has a student and/or family Fixed Fee and to have the option to adjust the fees.
Refer to Fixed Fees (Tuition) for more details.

Makeup Settings
When you track absences in Jackrabbit, you can offer your students the option of making up their missed classes.
These settings control makeups.
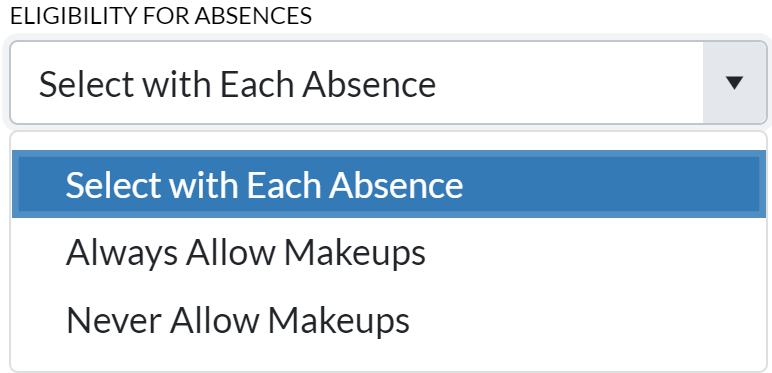 |
Eligibility for Absences Define how a student's eligibility to make up a class is assessed when an absence is recorded.
|
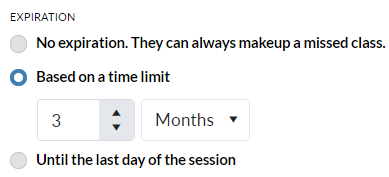 |
Expiration It's a common policy that students must make up a class within a certain time frame (such as 2 months). Save time and effort by setting the eligibility for all makeups to expire automatically after a designated time frame. There are three options for setting expiration dates:
When the current date is later than the makeup expiration date, eligibility is marked as expired, and a makeup class cannot be scheduled. Before the eligibility has expired, a makeup expiration date can be edited to extend the date to accommodate for special situations, such as an extended illness. Optionally, update the makeup expiration dates for multiple absences during a specified time frame. See the Frequently Asked Questions below. |
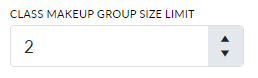 |
Class Makeup Group Size Limit Select the number of extra spots you will allow in a class for makeups. If you don't want makeups to exceed the class maximum number of students set this to zero (0).
|
Frequently Asked Questions
Q. Can I update the makeup expiration dates for multiple absences at once?
A. If your makeup policy is to give students a specific time frame for them to make up their missed classes, you'll define that in your makeup settings above.
You can change the expiration date for multiple absences at the same time based on the date they occurred.
- Go to the Gear icon > Settings > General > Organization Defaults (left menu) > Makeup Settings > Expiration.
- Select a longer expiration time period for the makeup classes. You also have the option of selecting No expiration. They can always make up a missed class. These settings can be changed and updated at any time.
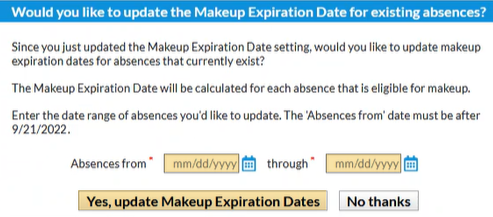
- Click Save Changes once the Makeup Settings are selected and enter the date range for the absences in the pop-up window. Note: The system allows you to select a date range within the past 180 days (6 months).
- Click Yes, update Makeup Expiration Dates and you will see a Success! message and a list of the number of absences that were updated.

Parent Portal Absence & Makeup Settings
When you use the Parent Portal, you can allow parents to schedule absences through their portals. This option is available regardless of whether you track absences or track attendance in Jackrabbit.
If you track absences, you'll have the option of offering makeups for missed classes. If you do offer makeups, you can also allow parents to schedule makeups in the Parent Portal.
There are several settings throughout Jackrabbit that control a parent's ability to schedule absences and makeups in the Parent Portal; review the various settings. This section covers the Parent Portal Absence & Makeup Settings.
Parent Portal Absence Settings
These settings control how absences are displayed in the Parent Portal on the Absences (or Attendance) tab in the student record and on the Absences & Makeups page (from the hamburger menu). They define whether or not you will allow parents to record absences in their portals and control when they can be scheduled.
| Absences display rules | |
 |
What Absences Would You Like Your Parents to See? Select which absences you want to display in the Parent Portal:
These three rules can be used in conjunction with each other. An absence is displayed for each class a student missed; if several classes were missed on one day, each class counts as an absence. |
| Allow parents to record absences? | |
 |
Allow Parents to Record Absences via the Parent Portal Control whether or not parents can schedule absences for their students through their portals. When you allow parents to record absences in the Parent Portal, access to an Absences & Makeups page is added to the hamburger menu in their portals. This page summarizes all absences for all students in the family and a button opens a modal for the parent to schedule absences. |
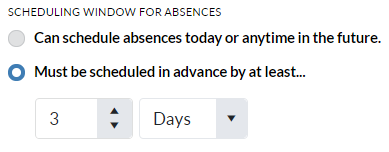 |
Scheduling Window for Absences If you are allowing your parents to record absences in their portals, do you require advance notice?
|
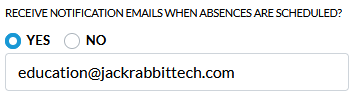 |
Receive notification emails when absences are scheduled? When an absence is scheduled in the Parent Portal, Jackrabbit immediately (and always) sends an email notification to:
When this field is set to Yes, Jackrabbit will send an additional email notification to the email address you designate advising that an absence has been scheduled. |
Parent Portal Makeup Settings
If you offer makeups (when tracking absences), these settings define whether or not your parents can schedule makeups in their portals, outline the rules for which classes will be available for makeup, determine when makeups can be scheduled, and specify if parents can cancel makeups they've scheduled.
These settings depend on the selections made in your Makeup Settings; if they are set to "Never Allow Makeups," the settings covered below are hidden.
| Allow parents to schedule makeups? | |
 |
Allow Parents to Schedule Makeups via the Parent Portal Control whether or not parents can schedule absences for their students through their portals. |
 |
Only Allow Makeups in Classes with at Least One Student Enrolled Set this to yes to avoid a makeup class being booked in a private lesson that has an opening. |
| Makeup class similarity rules | |
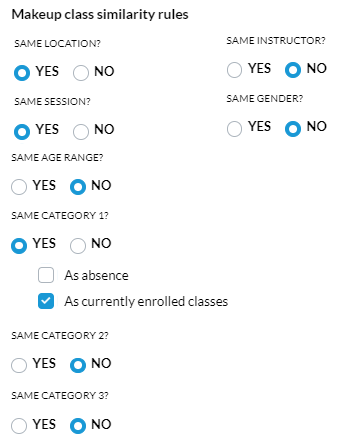 |
These rules control which classes display when a parent schedules a makeup through their Parent Portal. Each rule asks the question, "Does the makeup class have to have the same xxx as the class that my student was absent from?" When these are all set to No, all classes with openings (adjusted for makeups and absences) will display. Setting a rule to Yes will omit classes that do not have the same xxx (Location, Session, etc.) as the class the student missed. If set to Yes, the Category 1, 2, and 3 rules provide an additional option to specify whether the makeup class must have the same Category value as the class the student was absent from, the class they are currently enrolled in, or both. This can be useful if students advance through classes quickly, e.g., from one level to another. |
| Makeup scheduling rules | |
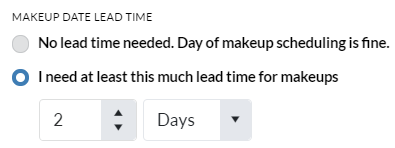 |
Makeup Date Lead Time Use this scheduling rule to prevent parents from scheduling makeups at the last minute.
|
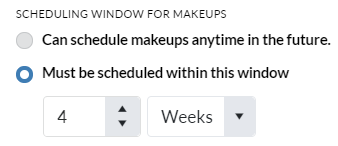 |
Scheduling Window for Makeups Do you require that makeup classes be scheduled within a specified time frame? The scheduling window refers to how far away the makeup class's date is from the current date.
|
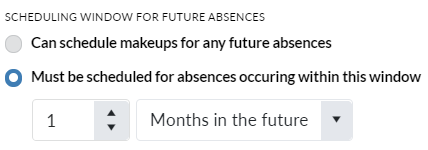 |
Scheduling Window for Future Absences Use this scheduling rule to prevent parents from scheduling a makeup for an absence that is too far in the future. The scheduling window refers to how far the date of the absence is from the current date.
|
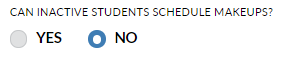 |
Can Inactive Students Schedule Makeups? Control whether or not makeups can be scheduled in the Parent Portal for students who are not currently enrolled in classes, i.e., are inactive. |
| Makeup notifications | |
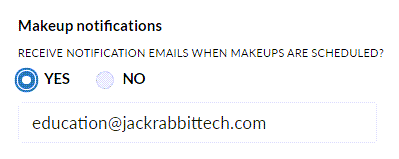 |
Receive notification emails when makeups are scheduled? Whenever a makeup is scheduled in the Parent Portal, Jackrabbit immediately (and always) sends an email notification to the class instructor, the primary family contact, and the address related to the Portal Login ID that scheduled the makeup. Set this field to Yes to send an additional email notification to the email address listed, which advises that a makeup has been scheduled. |
|
Schedule makeup message
| |
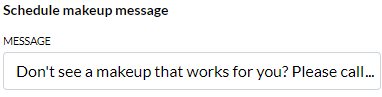 |
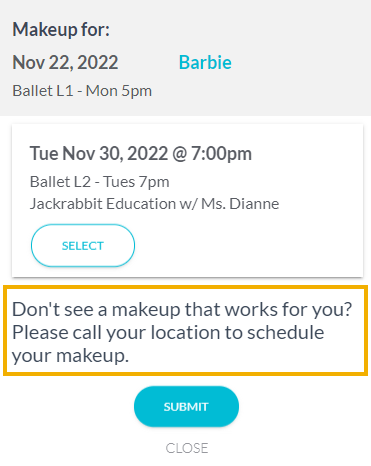
Message Below Available Class Makeup List This setting allows you to customize the message that appears at the bottom of the available makeup classes window.
|
| Makeup success message | |
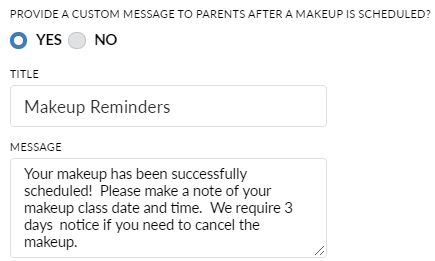 |
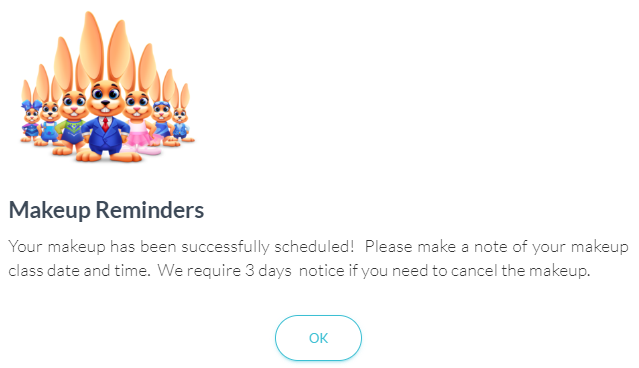
Provide a custom message to parents after a makeup is scheduled? Set this to Yes to customize a confirmation that will display to advise the parent they successfully scheduled their makeup class.
|
| Cancellation rules | |
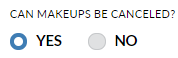 |
Can Makeups be Canceled? Control whether or not makeups can be canceled in the Parent Portal. |
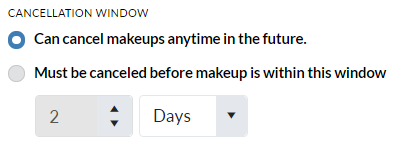 |
Cancellation Window If you are allowing your parents to cancel makeups in their portals, do you require cancellations to be done with advance notice?
|
Time Zone & Date Settings
In the Organization Default Settings, there are several settings for Time Zone and Dates.
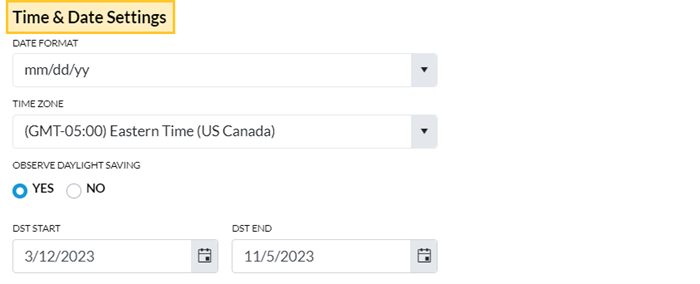
- Go to the Gear icon > Settings > General > Organization Defaults (left menu) > Time & Date Settings.
- Select the Date Format for your organization. Jackrabbit uses the US standard date format of mm/dd/yyyy throughout the system, and it is not possible at this time to use another format inside the system. You can, however, choose dd/mm/yyyy for external (customer) views such as on the Online Registration form: student birth date or on customer statements.
- Verify your Time Zone to ensure that all financial transactions and enrollment records use your area's correct date and time.
Note: Jackrabbit defaults to Eastern Time - US/Canada if this setting is not changed.
- Verify the dates if you observe daylight savings time and update if needed.
- Save Changes.
Frequently Asked Questions
Q. We use the UK date format of dd/mm for our data. If I decide to import my data, will that be a problem?
A. Jackrabbit uses the US format of mm/dd. We should be able to convert the dates into US format for you. Realize that inside your system, all dates will be presented in US format of mm/dd/yyyy. If we have trouble converting your dates we will let you know.
Costume / Apparel Module Settings
The Costume/Apparel Module Settings determine the defaults for the Costume module.
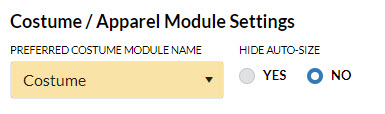
The default for this module is determined by the edition of Jackrabbit you are using. You can rename it to any one of the following: Apparel, Costume, Equipment, Materials, Supplies, or Uniform.
Classes Menu > Costume Management

Class Record View

Hide Auto-Size
The Hide Auto-Size setting lets you choose whether to hide the auto-size option in Jackrabbit's Costume/Apparel module. Learn more about auto-sizing in the How to Guide: Costume/Apparel Management.
Recital Module Settings
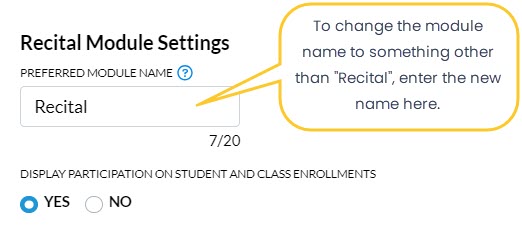
Preferred Module Name
The default module name is Recital. If you prefer a different name, enter it here. This will change the name to your preferred name throughout Jackrabbit, including the Events menu > Recital.
The Preferred Recital module name field has a limit of 20 characters. Examples of preferred names include Production, Showcase, Gala, and Exhibition.
Display Participation on Student and Class Enrollments
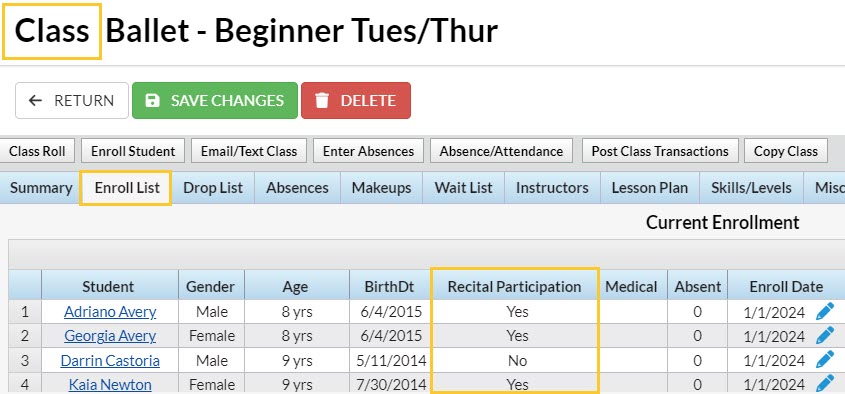
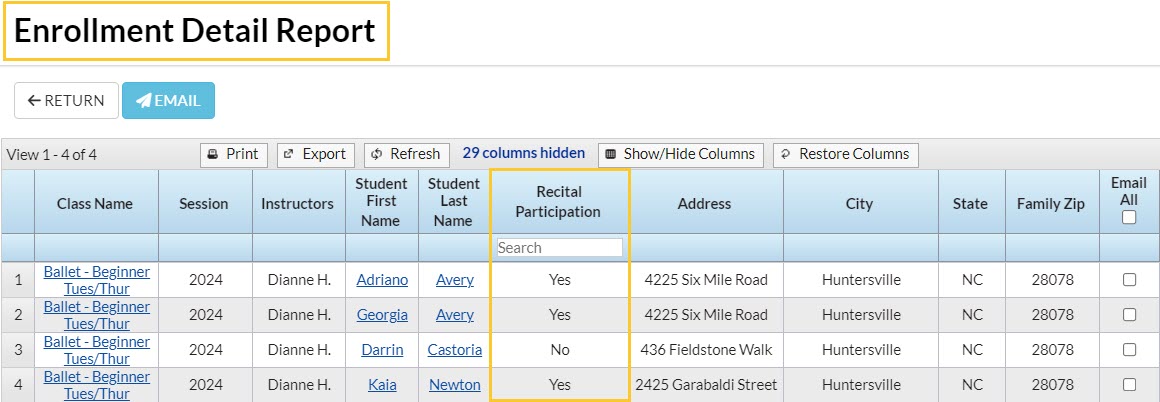
This setting controls the display of recital participation columns in the Student record, Class record, Enrollment Detail report, and Staff Portal.
A student's recital participation is indicated using the checkbox that appears next to their name when adding a class they are enrolled into a recital.
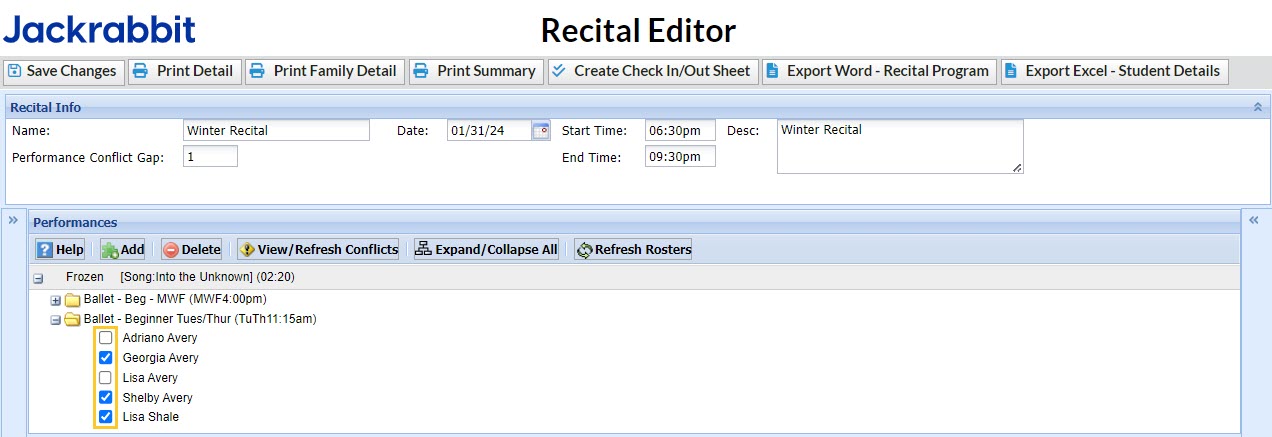
When set to Yes, a Recital Participation column is added to the Student record (Summary & Classes tabs), Class record (Enroll List tab), and the Enrollment Detail report to allow you to quickly and easily see whether or not students are participating in recitals.
- Unassigned - The class has not been added to any recitals.
- No - The student's checkbox is not selected (clear) in a recital.
- Yes - The student's checkbox is selected (checked) in a recital. A Ticket icon will display next to the student's name on the Staff Portal Attendance page for that class.