Jackrabbit's Resources feature lets you upload files and add links to the Family, Student, Class, and Staff records where they are stored on the Resources tab.
- Add a resource to a Class record to share with both parents through the Parent Portal and staff via the Staff Portal, or add it to a Student record to share with parents in the Parent Portal.
- Limit access to sensitive documents to only Users with the required permissions.
- Retain resources when a family is placed in the Lead File and later restore them.
The Resources Tab
Each record features a Resources tab where you can upload files and add links (URLs). For example, add a Google Doc link with instructions in the Class record or upload a permission form document to the Family record.
- The Resources tab in each of the Family, Student, Class, and Staff records displays the number of resources on file.

- Each record type can store up to 15MB of data, with usage shown as a progress bar and available space counted down.
- Sort the resources by date created, modified, or alphabetized by resource title or filename.
- Each resource card displays a timestamp for the date created, the User who added the resource, the resource name, file name or URL, time/date, and the name of the User who last modified the resource.
- A badge indicates a restricted resource.
 Note: The card for a restricted resource will not display to Users who don't have the View Restricted Files User permission.
 - A resource shared to the Parent or Staff Portal will display a badge in the Class record to indicate that it has been published.

- A resource shared to the Parent Portal will display a badge in a Student record to indicate that it has been published.

- Manage each resource via the links in the Resource card to Edit, View, or Delete.

 Note: The card for a restricted resource will not display to Users who don't have the View Restricted Files User permission.


Add a Resource in a Family or Staff Record
Follow these steps to add a resource to a Family or Staff record.
- Locate and open the Family or Staff record.
- Click the + New button
 on the Resources tab to open the Add a resource window.
 - Add a Name to the resource. This will appear in the Resource card on the Resources tab.
- Select the Audience:
- Is this a restricted resource? This is off by default. Toggle it on to restrict access to specific Users. When restricted, only Jackrabbit Users with the View Restricted Files User permission will be able to see the resource. Note: If the file is restricted, the resource will not be visible in the Parent Portal.
- Select the Resource location:
- I'll upload it - Select the files to upload. Accepted file types include:
.doc .pdf .jpg .txt .xls .jpeg .odt .rtf .html .epub .png .mp3 .mp4 .csv .eml .docx .xlsx .tex .wks .wps .wpd .mov4
- I'll link to it - Enter the URL in the Resource Link field, such as a YouTube video link or a Dropbox file.
- I'll upload it - Select the files to upload. Accepted file types include:
- Click Add, and the resource will be added to the record.
 on the Resources tab to open the Add a resource window.
Add a Resource in a Student Record
Follow these steps to add a resource to an individual Student record.
- Go to the Students menu > All Students.
- Locate and open the student's record.
- Select the Resources tab and click the + New buttonto open the Add a resource window.
- Add a Name for the resource. This name will appear on the Resource card.
- Select the Audience:
- Is this a resource for parents? Toggle this on to enable parents to view the resource.
- Is this a restricted resource? This is off by default. Toggle it on to restrict access to specific Users. When restricted, only Jackrabbit Users with the View Restricted Files User permission will be able to see the resource. Note: If the file is restricted, the resource will not be visible in the Parent Portal.
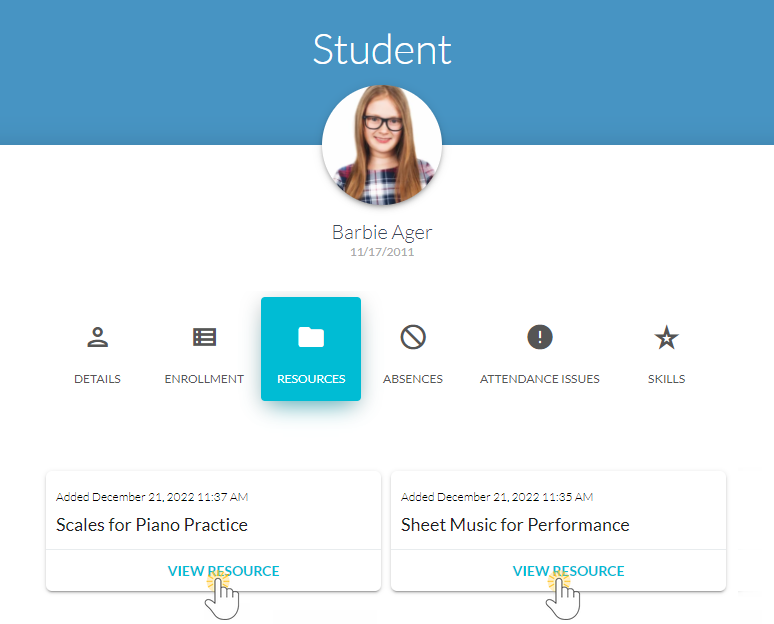
Student resources are displayed on the Resources tab of the student information in the Parent Portal.
- Select the Resource location:
- I'll upload it - Select files to upload. Accepted file types include:
.doc .pdf .jpg .txt .xls .jpeg .odt .rtf .html .epub .png .mp3 .mp4 .csv .eml .docx .xlsx .tex .wks .wps .wpd .mov4
- I'll link to it - Enter the URL in the Resource Link field, such as a YouTube video link or a Dropbox file.
- I'll upload it - Select files to upload. Accepted file types include:
- Click Add, and the resource will be added to the Student record.

Add a Resource in a Class Record
Follow these steps to add a resource to a Class record.
- Go to the Classes menu > All Classes.
- Locate and open the Class record.
- Select the Resources tab and click the + New button to open the Add a resource window.
- Add a Name to the resource. This will appear on the Resource card.
- A Class resource published to the Parent Portal will display as a View Resources link on the Class card.
- A Class resource published to the Staff Portal will appear on the Manage Classes tab > Actions > Resources (button).
- Select the Audience:
- Is this a resource for parents? This is off by default. Toggle it on to display in the Parent Portal.
- Is this a resource for staff? This is off by default. Toggle it on to display in the Staff Portal.
- Is this a restricted resource? This is off by default. Toggle it on to restrict access to specific Users.
When restricted, only Jackrabbit Users with the View Restricted Files User permission can see the resource. Note: If the file is restricted, the resource will not be visible in the Parent Portal.A View Resources link on the class details card provides access to Class resources in the Parent Portal. 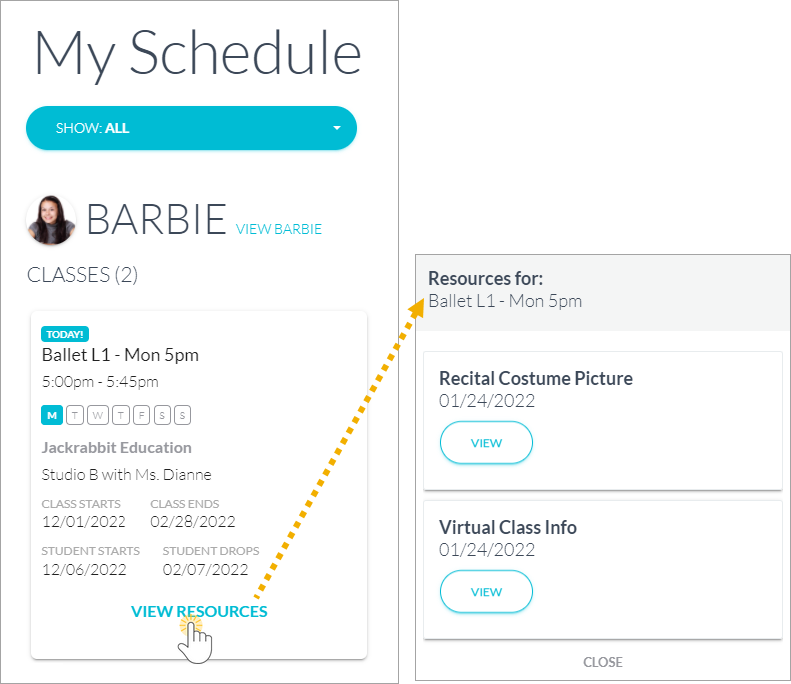
A Resources button on the Manage Classes tab provides access to Class resources in the Staff Portal. 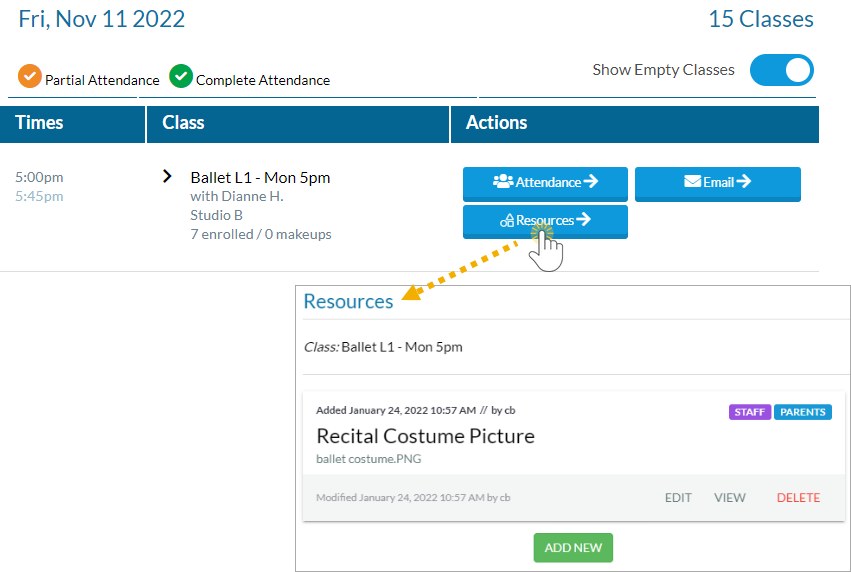
- Select the Resource location:
- I'll upload it - Select the files to upload. Accepted file types include:
.doc .pdf .jpg .txt .xls .jpeg .odt .rtf .html .epub .png .mp3 .mp4 .csv .eml .docx .xlsx .tex .wks .wps .wpd .mov4 I'll link to it - Enter the URL in the Resource Link field, such as a YouTube video link or a Dropbox file.
- I'll upload it - Select the files to upload. Accepted file types include:
- Click Add, and the resource will be added to the Class record.


Add a Resource to a Single Class in the All Classes Grid
Follow these steps to add a resource to a Class record in the All Classes grid.
- Go to the Classes menu > All Classes.
- Locate the Class column search field and enter the class name.
- Select one of these options to add a resource to the class.
Use the
Class Column- Click the class name located in the Class column.
- Add the resource directly to the Class record as detailed in the Add a Resource in a Class Record section above.
Use the Class
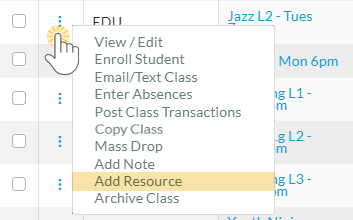
Row Menu- Click the Row menu
 in the class row.
 - Select Add Resource.
- Complete the information in the Add a resource window.
- Enter a Name. This will appear in the Resource card.
- Select the Audience:
- Is this a resource for parents? This is off by default. Toggle it on to display in the Parent Portal.
- Is this a resource for staff? This is off by default. Toggle it on to display in the Staff Portal.
- Is this a restricted resource? This is off by default. Toggle it on to restrict access to specific Users. When restricted, only Jackrabbit Users with the View Restricted Files User permission will be able to see the resource. Note: If the file is restricted, the resource will not be visible in the Parent Portal.
- Select the Resource location:
- I'll upload it - Select the files to upload. Accepted file types include:
.doc .pdf .jpg .txt .xls .jpeg .odt .rtf .html .epub .png .mp3 .mp4 .csv .eml .docx .xlsx .tex .wks .wps .wpd .mov4
- I'll link to it - Enter the URL in the Resource Link field, such as a YouTube video link or a Dropbox file.
- I'll upload it - Select the files to upload. Accepted file types include:
- Click Add, and the resource will be added to the record.
 in the class row.
Add a Resource to Multiple Classes in the All Classes Grid
Follow these steps to add a resource to multiple classes in the All Classes grid.
- Go to the Classes menu > All Classes. (Use the Filter icon
 to filter the classes if needed.)
 - Select the classes to which you want to add a resource:
- Leave the checkbox in the first column of the grid clear. This will automatically select all classes in the grid.
- To select classes, select the checkbox in the first column of the grid for each class you want to work with.
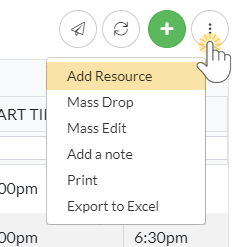
- Click the More icon
 > Add Resource.
- Complete the information in the Add a resource window.
- Enter a Name. This will appear in the Resource card.
- Select the Audience:
- Is this a resource for parents? This is off by default. Toggle it on to display in the Parent Portal.
- Is this a resource for staff? This is off by default. Toggle it on to display in the Staff Portal.
- Is this a restricted resource? This is off by default. Toggle it on to restrict access to specific Users. When restricted, only Jackrabbit Users with the View Restricted Files User permission will be able to see the resource. Note: If the file is restricted, the resource will not be visible in the Parent Portal.
- Select the Resource location:
- I'll upload it - Select the files to upload. Accepted file types include:
.doc .pdf .jpg .txt .xls .jpeg .odt .rtf .html .epub .png .mp3 .mp4 .csv .eml .docx .xlsx .tex .wks .wps .wpd .mov4
- I'll link to it - Enter the URL in the Resource Link field, such as a YouTube video link or a Dropbox file.
- I'll upload it - Select the files to upload. Accepted file types include:
- Click Add, and the resource will be added to the selected classes.

Add a Class Resource in the Staff Portal
When granted access, a staff person can add a class resource in the Staff Portal. To grant access, go to the Staff record. On the Portal Setting tab, set Allow staff person to manage resources to Yes.
You can add the resource with a link or upload a file for a class in the Staff Portal. The added resource is also in the Class record > Resources (tab).
Note: Resources added in the Staff Portal can't be restricted.
 |
Manage Resources (Edit, View, Delete)
Edit a Resource
From the Resource card, click Edit to edit an existing resource. You can update the resource name, adjust audience settings, replace a current file (if the resource was an uploaded file), or change the resource location to a link and vice versa. The Resource card will update the date modified timestamp and User information to reflect any changes made.
Note: A Resource record can only contain an uploaded file or a link, not both types.
View a Resource
Select View in a Resource card to access the resource. Depending on the resource type, it will download to your computer or open in a new tab. If the resource is in the Class record and published to the Parent Portal or Staff Portal, it can be viewed via download or in a new browser tab.
Delete a Resource
To remove a resource from the record, select Delete in the Resource card. You will be asked to confirm that you want to delete the resource.
Review Jackrabbit's Terms of Use. Uploading a file confirms you have agreed to the terms and that you have consent to possess the resource you are uploading.